Onions
|
|
I have not had much luck with growing onions from seed in
the past. I was talking to a friend and she said that she always grew onions from seed and
said it was easy to do. She has given me some info on how to grow onions from seed along
with seeds for the type onions she has been growing.
First plant the seeds on April 1. Plant the seeds in seed starting mix (not potting soil).
Have the seed starting mix 3 to 4 inches deep as the roots grow deep. Keep the seed
starting mix damp but not over soaked. Spread several seeds out and cover them up � to �
inch deep over the seeds. Then give then a good spray of water to get them started. The
Ailsa Craig Exhibition seeds are dark and hard to see in photo.
Here are the type onion seed I am using.
Patterson Hybrid Onion This yellow early onion keeps for a long time. Medium-large bulbs
have straw-colored skin and small necks that dry quickly. Much less sulfur than other
varieties, resulting in that coveted sweet-onion flavor. Excellent raw on burgers and in
salsa, and makes a wonderful French onion soup. A long-day onion that matures in 105 days
Ailsa Craig Exhibition Sweet Onion
This popular heirloom onion is renowned for producing exhibition size 2 pound globe shaped
onions even in areas with shorter, cooler growing seasons. The huge bulbs have
straw-colored yellow skin and sweet, firm white flesh. . Not recommended for long storage.
A long-day onion that matures in 95 days
I did not know this but you get bigger and better onions from seeds than you do by using
onion sets. I just thought I could save some money by growing them from seed. Here is what
I found out.
Onions grow the first year to make big onion bulbs. The second year they grow to make
seeds. When you use onion sets you are using onions in their second year. Yes, the onion
sets will grow bulbs but then use a lot of the energy to grow seeds. In the center of the
onion it will grow a scape to flower and make seeds. This scape in the onion can be hard
to dry down and stay a bit green. This can shorten the storage time you can keep them for.
Now you know why it is better to grow them from seed.
|
Sugar cake for bees |
|
In the late winter the weather can sometimes get quite warm. Just like many
people get thinking we are having an early spring,the bees can also. The bees start flying
and find some things and bring it back to the hive. The queen starts to lay more eggs.
With them have low amounts of honey and the need for more food a hive can soon starve.
This is when a bee keeper needs to give them more food. That is when we need to add a sugar cake to the hive. A sugar cake
is added right on top of the frames in the hive so the bees can get to it easily. When the
weather gets back to cold temperature you cannot feed them sugar water in a feeder because
it is too cold. That is why you need to use a sugar cake to feed the bees.
The last several days have had been as low as 11f and some
days not getting above freezing. I want to do what I can to make the hive survive till
spring.
This last week I made up a sugar cake to feed the bees. I
put it on the have Tuesday when the temperature got above 55f. I hope this will give them
enough food to get them in to spring. I will add the other half in about a week when it
gets above 55f. A sugar cake is made by mixing sugar in water and heating it up to a
temperature so it will turn hard like a big piece of hard candy.

I take a 4 pound bag of sugar and 14 ounces of water. Bring the water to a boil then
slowly add the sugar until all the sugar is a mixture in the boiling pot. Using a candy
thermometer keep boiling until the temperature reaches 250F. I then add 2 drops of tea
tree oil and 1 drop of wintergreen oil to the mix. Then I pour it into an 11x16 inch cake
pan lined with parchment paper. Let it harden then I break it in half and it is ready to
add to the hive.
We will see if this keeps them going till
spring.
|
Peppers Transplant |
|
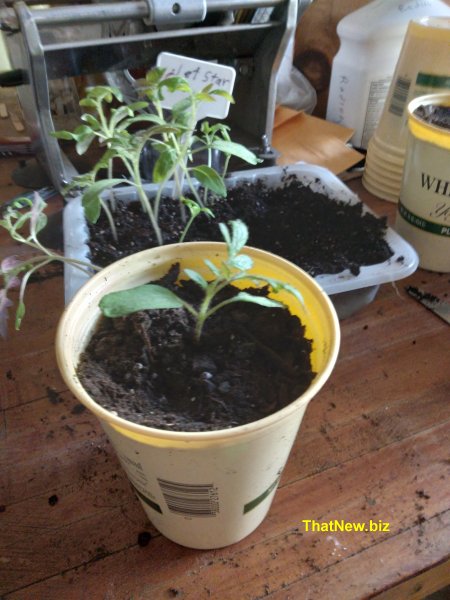
It is March 22, time to transplant the peppers in to a
larger container. 
The Chinese Giant had 8 of the 12 seeds grow.
The Big Red Sweet peppers had 9 of the 12 seeds grow.
The seeds I saved from the pepper I bought at the store had 3 of the 9 seeds I planted
grow.
The King of The North did not have any come up but remember these were old seeds. Scroll
down to where I planted the seeds to see how old they were.
The peppers grew faster than I had expected to this point. I think the light I posted
earlier had a lot to do with how fast they got their true leafs.
The pepper plants are now big enough to be moved into a larger container. I used the solo
cups from last year. ( you can see that on page 1 )
I put some potting soil in the bottom of the solo cups carefully dug out the peppers,
placed it in the cup and added potting soil around the roots. I pressed the soil around
the roots lightly and gave it a little water to help settle the soil around the roots.

I placed them in the window. They will be their until I plant them outside.
Some great gifts ideas for your gardener friends
Medicinal Garden Kit
Big Bat Box
Quality power stations.

|
Bee Swarm Trap |
|
During the spring a colony of bees can grow massively,
both in terms of number of worker bees and needed space. The available space becomes
smaller and smaller. The bees split up and part of the bees leave to find a new place to
live.
Swarming bees are on their way to find a new home. Dr Thomas Seeley did a study on the
size space in trees that bees lived in. He found that the space was between 30 and 60
liters of space. You can find out more about Dr Thomas Seeley from Cornell University
Scout bees then go out looking for the new location to move into where it can begin its
new colony of bees.
That is where a swarm trap comes in to play.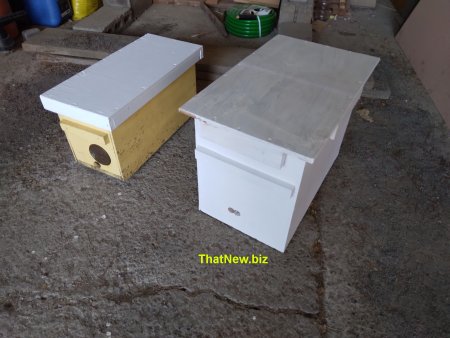
I had found many places where people were talking about swarm traps and most are saying to
build them at about 40 liters. I did the math and came up with about 2450 square inches.
The swarm trap in the photo on the left was one I built a few years ago. I did catch one
small swarm in it. It just was not doing as good of a job as I would have thought. Doing
the math on the trap 9.5" X 7.5" X 18" I came up with 1282 sq in. Just a
bit more than half the size they were saying for a good size.
I had a 1"x12"X4' left over and some plywood from a project and did the math on
a box I could make a new trap out of it. The inside space would be 11.25" x 14"x
18" or 2835 sq in. That would make it larger than the minimum size for a swarm trap.
With that info I built a new trap, the one on the right in the photo.
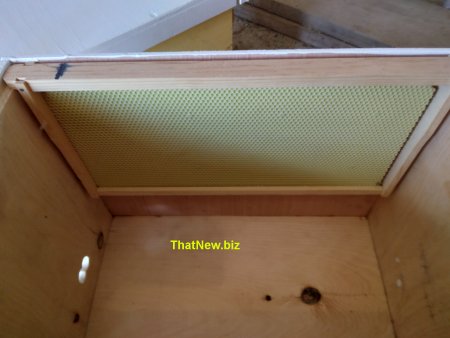
To help attract the bees to my new swarm trap I am going to place a bee frames with
plastic and bees wax foundation in first.
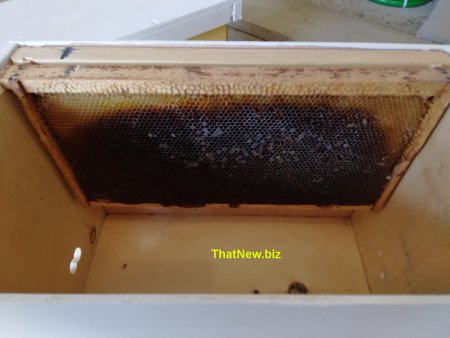
Next a bee hive frames with old comb so the queen can start laying eggs. The old comb will
help the place smell like home.
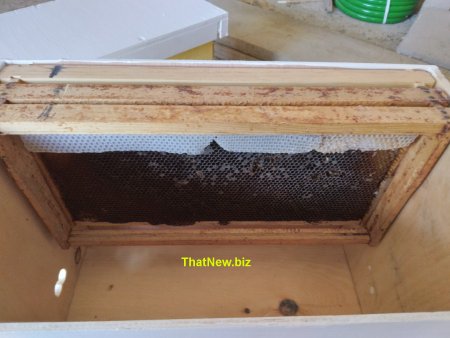
Then I will add 4 more frames with a starter strip to help the bees build come in the
frames and not some place where it would make it harder when moving them in to a hive.
I will add some bee propolis that I have to the bottom of the box. Then give it a spray of
swarm commander (a swarm lure) in the box and at the entrance
Here where I live I have noticed that most of the swarms happen in late April or May when
the temperature is above 85f. I went out last year on the first day when it was above 85f
to see if I could spot any swarms. I sat down near my swarm trap and watch several bees
checking it out. I thought a swarm might move in any day but none did. It must have just
been too small for them.
Bees use landmarks to navigate, railroad tracks, roads, rivers and power lines. I live
where all of these cross in less than one eighth of a mile making it a good place to put
up a swarm trap. In less than one eighth of a mile I have 3 roads, a river, power line,
and railroad tracks. I have seen as many as 6 swarms here in one year.
I will let you know how this new Swarm Trap works out. If you are thinking about keeping
bees this is a way to save on buying your bees.
|
Basil and Eggplant |
|
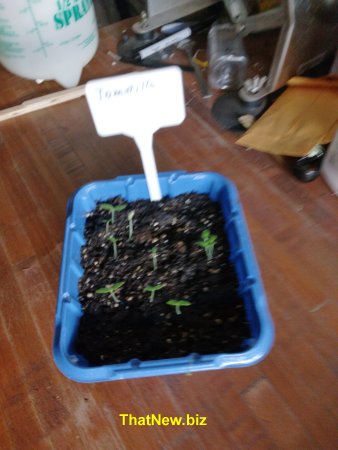
This week I planted some eggplant seeds. 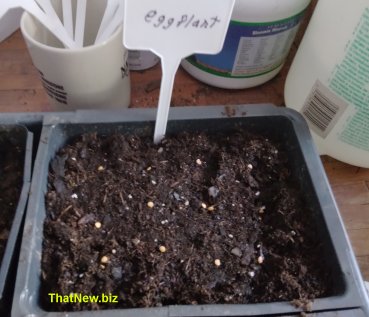
I placed 12 seeds in the container and covered them with about � inch of potting soil, I
water them and placed them on the heat mat with the peppers I planted last week. I will
move them to a larger container when they get their first true leafs.
I also planted some Large Leaf Basil seeds.
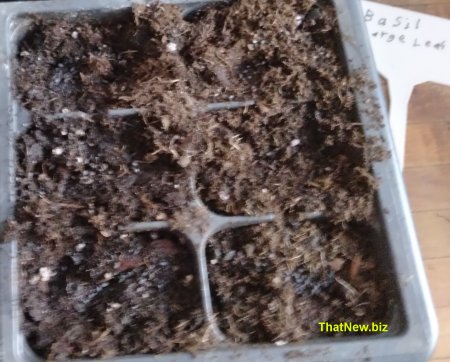
The basil seeds are small so I just sprinkled a few in each cell. Then I just ran my
finger across the seeds to settle them in to the potting soil. I then sprayed them with
water and added them In the tray with the heat mat.
|
| Peppers for 2024 |
|
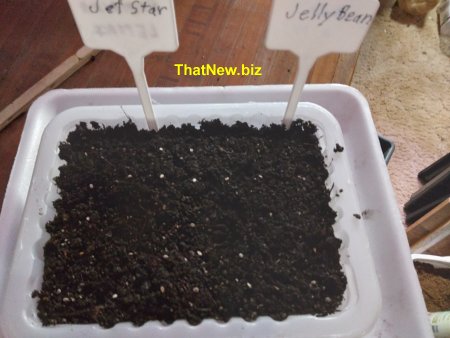
Peppers for 2024 It is February 24th and time to start
planting pepper seeds for this year’s pepper seedlings. 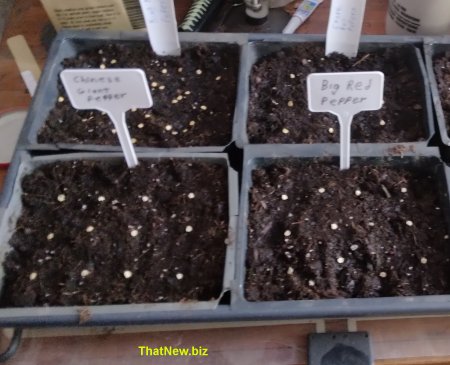
In the front row on the right I planted 12 seeds for Chinese Giant organic peppers.
Chinese Giant peppers are extremely large almost squared. The fruits can grow up to 6
inches tall and 4.5 inches in diameter. Medium-thick flesh that is sweet and mild. The
fruits are green and can turn red when mature .
Seedlings should be planted 12 to 18 inches apart.
I am trying this pepper because most of the peppers that I have grown here in NY
don’t get very big. Hoping these will do better than one in the past.
In the front row on the right I planted 12 seeds for Big Red Sweet peppers.
Big Red Sweet peppers are very sweet thick flesh. They turn from green to red and are 4
inch tall bell peppers. Excellent for fresh market or home gardens.
Seedlings should be planted 12 to 16 inches apart.
In the back row on the right I planted several King of The North. These seeds are from a
package of 2017 that I tested for germination and only a few germinated. I had good luck
growing them back then and hope a couple seeds will grow.
The King of the North is a good bell pepper for colder weather and short-season. This
pepper has a thick flesh, mild and sweet.
The pepper seeds in the back row on the right. I planted 6 seeds I saved from a pepper I
purchased at the store. It was a large green sweet pepper. When I tested the seeds for
germination they did well so I only planted 6 seeds. I just wanted to see if I could get
large peppers from the plants.
I planted the seeds in potting soil put about � inch potting soil over seeds. Moisten the
soil and put them on a heat mat. I will transplant them into a larger pot when they have
their first true leafs.
Potting soil and Garden
Supplies
|
Pyrethrum Daisy |
|
I am going to plant some pyrethrum daisy seeds to grow
this daisy.
I saw a YouTube video talking about this flower being a good plant to put in your garden
to help with pest control. In the video they said the plant did not harm pollinators.
Pyrethrum is a natural chemical extract from chrysanthemum and daisy plants that kills
insects. After doing more research on the plant I found that it can harm bees.
The Pyrethrum Daisy is good at repelling cabbage moths, cabbage white butter flies, leaf
hoppers, spider mites, and ticks.
I decided to grow and plant them in my big garden that is not near my bees. I am only
going to plant them in my rows of Cabbage, broccoli, and lettuce to see if that helps keep
down the cabbage worms.
I planted the seeds in a container to start the seeds February 5th. It take 10 to 12 weeks
from seed to be ready to plant outside.
I will let you know how they do.
Hearing
Loss
|
Grow lights |
|
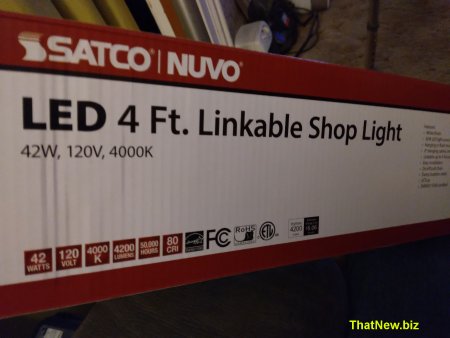
Some 4000k grow lights can cost over $150. That might be
ok for a person who is growing a lot of plants as a business. You would have to grow a lot
of plants to offset the cost of a light like that.
I was trying to grow a little romaine lettuce in my window. This year we have had nothing
but very cloudy days and the lettuce was almost dead because it was not getting enough
light.

That was when I knew I needed to do something because it would not be long when I will be
starting seedling for this year.
I found a 4000k led shop light at a local store on sale for $29. That is more in my price
range. Yea it might not be as good as a Full-Spectrum LED Grow Light but I am just doing
this as a hobby.
Just 2 days after I put up the new LED light I could see a bit of new life in the plants.
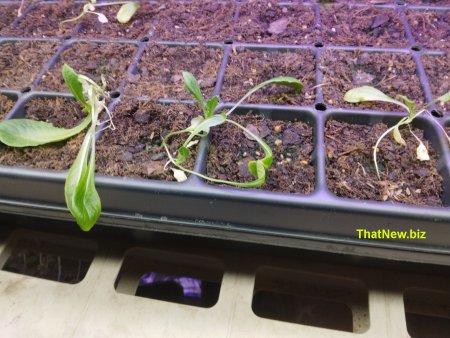
Only time will tell if this light will help my seedlings
not be so leggy.
Plague,
war, famine.. How our ancestors conquered it all...
Learn more about quality backup power stations.
|
Bees February 9 |
|
It was 59F and sunny today so I went out to see if any
bees were coming out of my hive. There was a few bees on the landing board and a few in
the air. 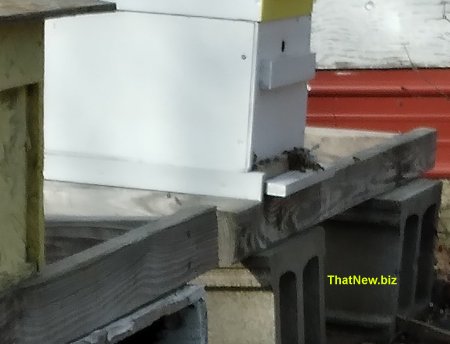
This gives me hope that they might make it to spring. When you get a warm day at this time
in NY, the bees come out to do a cleansing flight.
|
Seed Germination Test |
|
This is a good time to check the germination of the seeds
you saved and leftover seeds you might have.
Take a few seeds you have saved and put them on a paper towel. 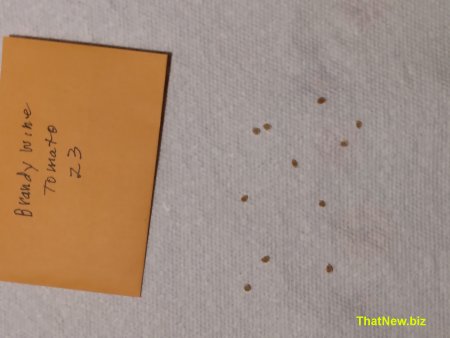
Or some old seeds you had leftover.
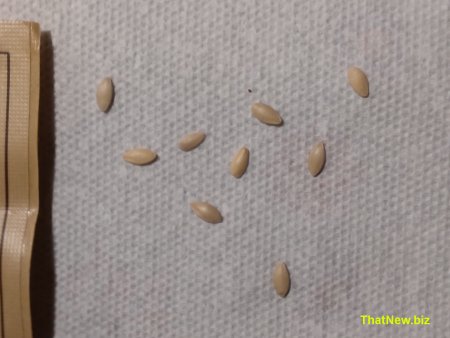
Fold the paper towel over and spray them with some water.

Place the paper towel in a plastic bag and put it in a warm dark place for 4 or 5 days.
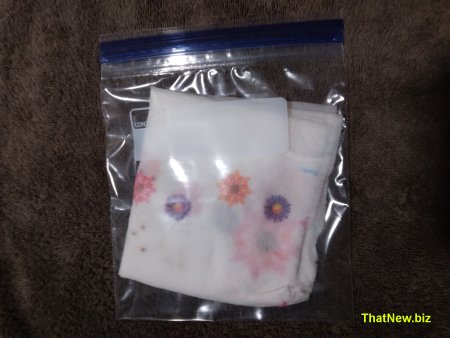
Take them out to see if they started to germinate.
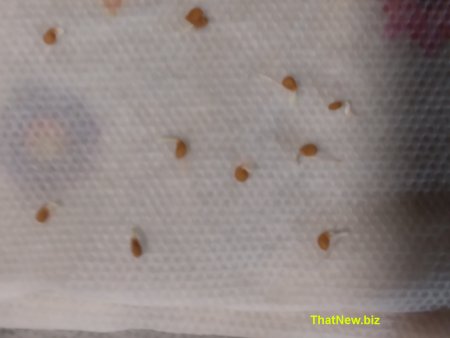

If your seeds did not start to germinate, you will know you need to order some more seeds.
I hope this helps you get ready for the new year of growing.
Hearing
Loss
|
Mung Bean Sprouts |
|
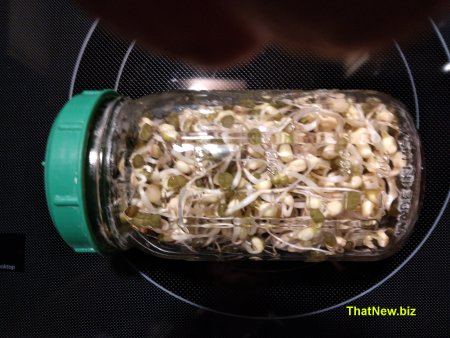
Mung Bean Sprouts are easy to grow. All you need is Mung
Beans, a jar with a lid that you can drain off the water.
I put in about 1/4 cup of mung beans in a jar and let them soak in water for 12 hours. 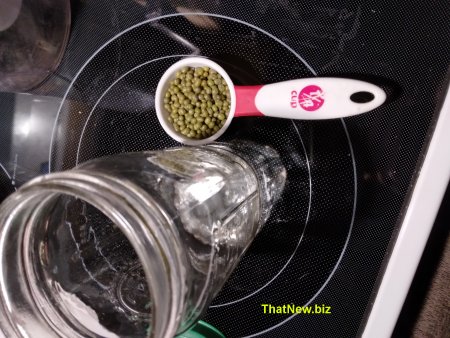
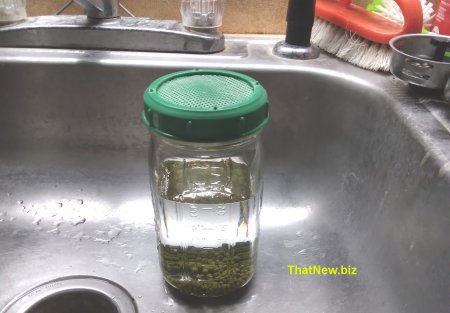
Then drain them and let sit in a dark place. Rinse the seeds off 2 or 3 times a day and
drain well.
They will start germinating in about a day. After 4 or 5 days they will grow big enough to
eat.
I put them in a plastic bowel in the refrigerator and they will last several days
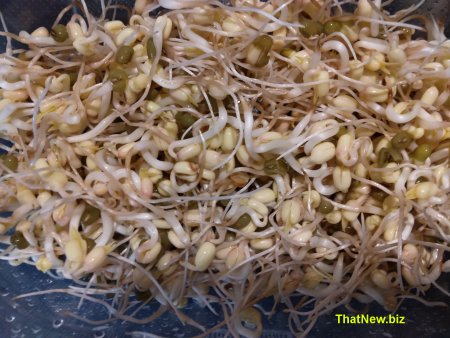
I like them just eat them as a healthy snack just as they are.
Mung Bean Sprouts are also good to add to your salad.
You can find several recipes for Mung Bean stir-fry on the internet.
Sprouting is fun and easy. Give it a try.
Plague,
war, famine.. How our ancestors conquered it all...
|
Honey Bees |
|
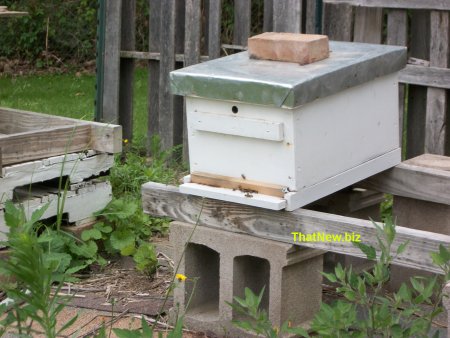
This is an update on how the Honey Bees were doing as they went into winter.
The bee swarm I got last summer was a little bit late. I feed them some sugar water to
help give them a good start.
I checked the bees out about 2 weeks after I got them and it looked like they had a good
queen. They had several frames of brood. ( new bees in the growing stage from eggs to bees
ready to come out as workers.)
A few weeks later the hive was just over full with bees. Being late in the year I added a
shallow box to the hive. I checked them for mites and all was good.
Just 2 weeks later when the goldenrod was about done for the year. I did a check
to see how much honey they had. The brood area was just full of honey. It looked like they
were honey bound. Honey bound is where the bees fill the brood area with honey a fast as
the new bees emerge from the come. This leaves no place for the queen to lay eggs.
I took out one of the frames that didn’t have much honey in it. I put in a frame of
comb that was drawn out in the middle of the have to give the queen a place to lay eggs.
The queen slows down in laying eggs in the late fall. She still needs to lay a few eggs
for winter bees to make it through the winter.
The bees stay in a tight cluster to keep warm and eat the honey in the hive to stay alive.
If they get damp they will be unable to keep warm. They need to keep dry, keep warm, have
enough new bees, and enough honey to make it through the winter.
In early spring when the bees start flying I will need to check and see If they need to be
feed sugar water to get them through till the flowers start coming out.
|
Strawberries |
|
Last year I ordered some strawberries seeds and started
them as listed on my page 1 of my blog. The seeds started ok but the hot sun coming
through my window dried them up and burned them to death. So much for trying that.
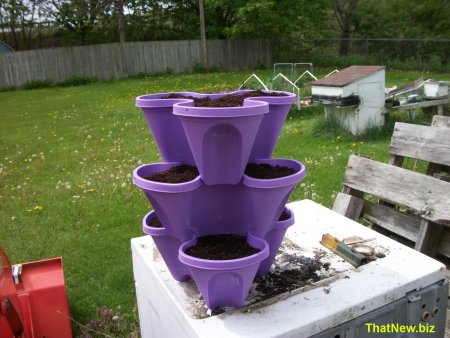
I still wanted to grow some strawberries so I ordered some plants. I decided to get a
planter to put them in. I bought this planter at Wal-Mart. 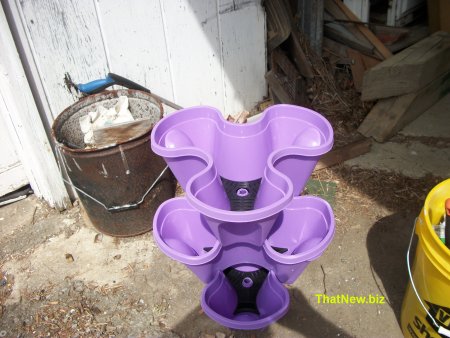
I filled the planter with potting soil to plant the strawberry plants in.
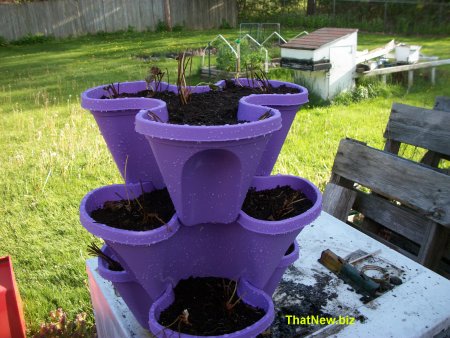
I have never grown strawberries before. The plants I got just looked like dead sticks. I
planted them into the planter and watered them anyway.
I could not find the photo I took when they are nice and green. This photo is what they
looked like 1/6/24 so they did grow well.
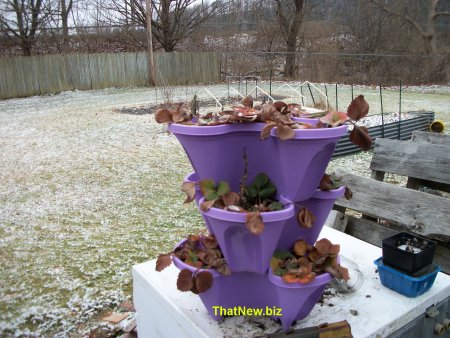
I didn’t get many strawberries this year. I was told they should produce more on the
second year. We will see how they do this summer.
|
Egg Shells
|
|
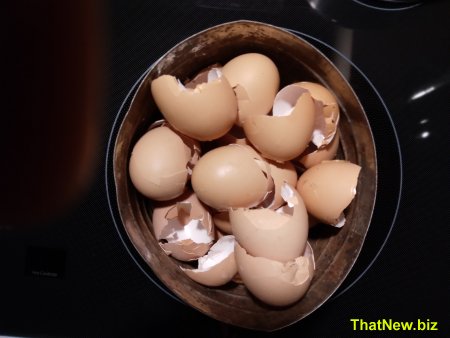
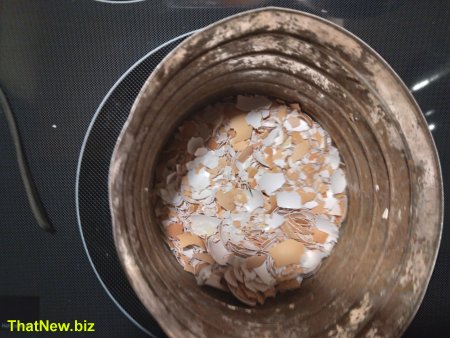
What do you do with your egg shells?
Did you know they are high in calcium carbonate?
I just put them in an old coffee can. When it gets full a use a 1 inch wood dowel rod to
crush them down. I keep adding to the can until it gets almost full.
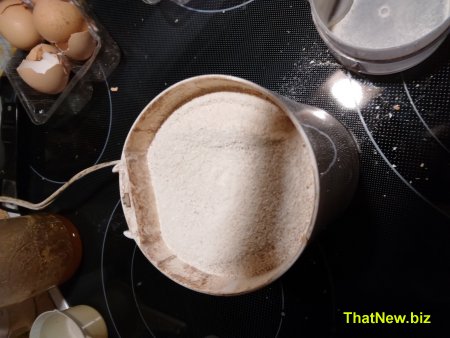
I then spread them on my garden and work them into the soil. Egg Shell takes a lot of time
to break down to release the calcium carbonate. To speed this up you can add vinegar to
the shells. It will foam up and help break down the shells. Adding shells to your garden
can help stop blossom end rot on tomatoes, peppers and eggplants.
I also use them to add grit to my worm bed. This helps the worms digest their food. It
also helps with the PH of the worm castings. I take the crushed shells and place them in
the oven to kill off any bad bacteria. Then grind them in an old coffee grinder and grind
them up so the worms can use them.
I add this to the food scraps when I feed the worms.
I am sure you have some other uses for egg shells.
|
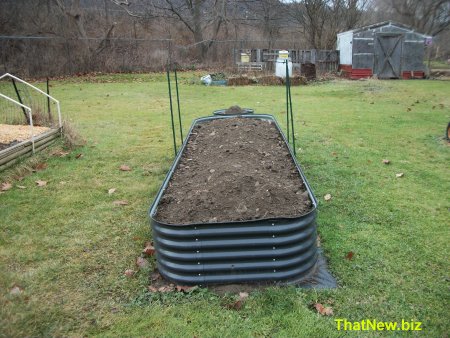
Filling my raised bed garden.
|
|
The first thing I did was to collect all the cardboard
boxes I had been saving. I unfolded them and put them in the bottom of the raised bed. 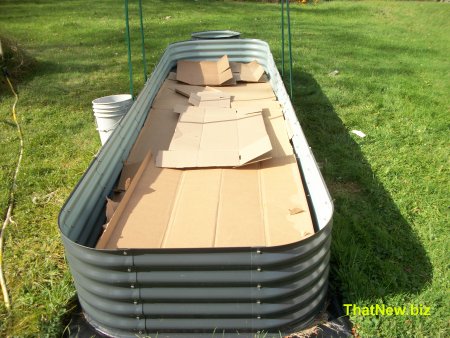
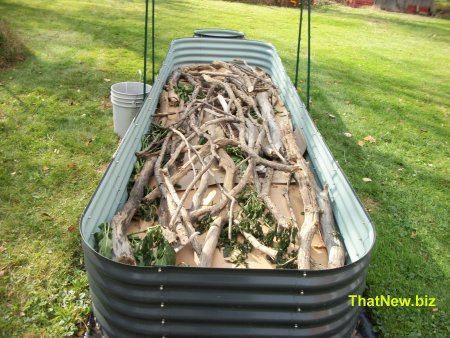
The next thing I did was get some of the tree limbs I had and place them in to take up
some space.
The town has a place where they take the leaves they pickup in the fall. The leaves are
sucked up and run through a shredder. They dump them in a pile and they are packed down.
If you are a village taxpayer, you can go there and get them for free. Maybe your town has
a place like that. I got 6 garbage bags of these leaves and put them in the raised bed. I
found that if I had about that many more leaves it would help me take up more space. The
next day I went there and got 6 more bags of leaves. I leveled them out and let them
settle in for a couple weeks.
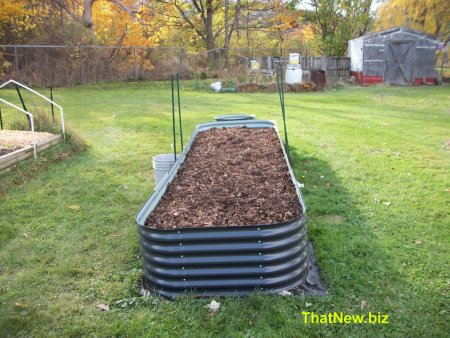
A friend brought me some dirt to top things off. I will leave it till spring to settle in.
|
Sweet Potato Slips
|
|
Sweet potato slips Have you ever wanted to try growing
sweet potato? Sweet potatoes are grown from slips that can cost as much as 35 dollars for
10 slips. Sweet potatoes are grown in hot moist areas but can you grow some here in NY? I
didn’t want to spend 35 dollars just to give it a try. Then I heard you could get
your own sweet potato slips by placing a sweet potato that you get at your store half way
in dirt. So at Easter time I this spring had one to give it a try. 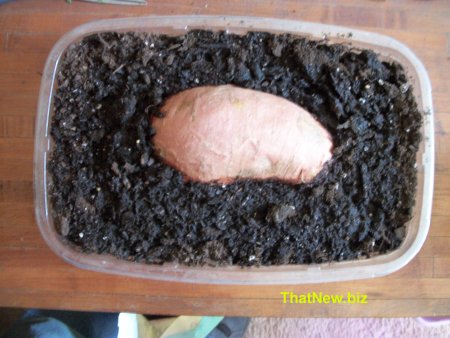
In mid June when it would be time to plant the sweet potato slips I didn’t have any
yet. By midsummer the sweet potato I placed in dirt still did not show any signs of
anything happening. In August I was about to throw it out I noticed a small shot coming
out of the sweet potato. So I decided to give it a little more time and a couple weeks
later I had some nice vines growing.
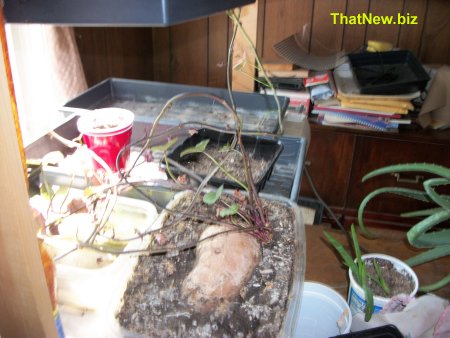
I cut some of the vines in several pieces.
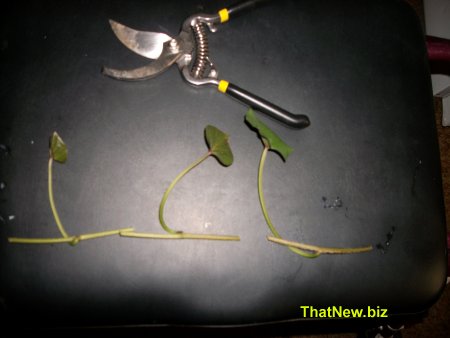
Placed them in to water to see if they would root.

A few weeks later I checked and the cutting did root just fine.
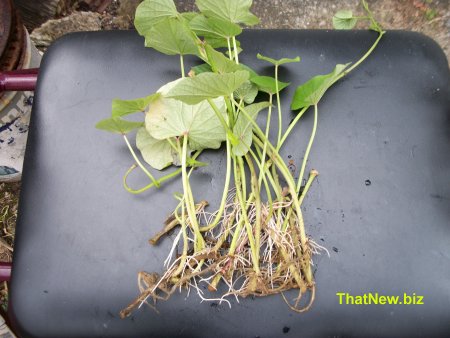
What I did find out was organic sweet potatoes will grow vines in 6 to 8 weeks. The ones
you buy in the store that are not organic are often sprayed with a root inhibitor. That
may be the reason it took so long. If you want to give it a try from ones you buy at the
store. You may want to start in at Christmas time. Better yet get an organic sweet potato.
Some great gifts ideas for your gardener friends
Medicinal Garden Kit
Big Bat Box
Quality power stations.
|
Mosquitoes and bugs. |
|
When it comes to gardening 2 things bug me, Mosquitoes
and bugs. I try to not use pesticides in my garden but sometimes I have to. Pesticides are
bad for my bees and not good for me. Then in the evening when it cools off in the summer,
the mosquitoes can sometimes drive me out of the garden.
Mosquitoes can carry viruses, bacteria, and parasites in their saliva. They can transmit
those pathogens into your body, causing severe and even life-threatening illness.
Mosquitoes are known to be carriers of Malaria, West Nile virus, Dengue fever, Yellow
fever, and several viruses that cause encephalitis.
It has been estimated that one bat can eat up to 8000 mosquito-sized insects each night.
Mosquitoes are bats primary diet, which make them a great natural mosquito predator.
Bats do eat other variety of insects. Some of the other insects are, Moths, Beetles,
Weevils, Flies, Lacewings, Dragonflies, Grasshoppers, and Crickets.
As you can see, Bats are a gardeners friend.
Why not help them out by putting up a place for them to
live. A bat house would be a great gift for any gardener. Why not get one for yourself or
a friend at Big Bat Box.
|
Butternut Squash Pie |
|
I had a lot of butternut squash and heard that some caned
pumpkin you buy may be squash. So I tried to make a pie with my butternut squash. I used
the recipe below and it came out ok. Maybe you could give it a try with your squash. 
Ingredients
2 cups Butternut Squash puree
1 8 oz cream cheese
2 Large eggs
2 tablespoons brown sugar
1 teaspoon ground cinnamon
� teaspoon ground ginger
� teaspoon ground nutmeg
� teaspoon salt
1 9” pie crust
Directions
Preheat oven to 425 degrees F
Mix room temperature cream cheese, eggs and brown sugar until smooth.
Then add the spices mix them in.
Then add the Butternut Squash puree and mix until smooth.
Pour into crust. I use a 9” gram cracker pie crust I get from the store.
Bake in preheated oven for 15 minutes.
Reduce oven temperature to 350 degrees F and continue backing for about 35 minutes.
Check to make sure the pie is done with a knife by inserting the knife 1 inch from crust
and it come out clean.
Let cool before serving.

Some great gifts ideas for your gardener friends
Medicinal Garden Kit
Big Bat Box
Quality power stations.
|
Rolling Blackouts |
|
Are you ready for rolling blackouts?
If demand for electricity exceeds the power supply capability of the network. Rolling
blackouts may be put in to effect.
Rolling blackouts may be local or may be more widespread and affect entire countries. This
is where the power is shut off for a couple hours. Then back on for a few hours and off
and on until demand for electricity lowers to the point the network can handle it.
What will you do for lights, a fan, your computer, or many things you need to use that
takes electricity?
If the electricity is out for a longer time your refrigerator or freezer may need power so
the food does not go bad.
Here in the north several people use wood pellets or coal
stoves to heat with. Most of them use a small amount of electricity to run a small fan to
keep them burning.
Stop and think what you would need if you had rolling blackouts.
Here is a tool that may make your life a bit better when the electric goes out. A power station or sometimes call a solar
generator. They fill in that gap when you have rolling blackouts. You can charge them
up when the power is on and use power out of them when the power is out. You can also use
a solar panel to charge them up. This makes them a great tool for any kind of power
outage. They are also a good tool for outdoor fun where there is no electric and you need
some.
One of the things I like about them is they don't make much noise like a gas generator
would. When camping for a long time you could charge them up with solar or a gas generator
in the day time and use the power at night. This will keep the others that are camping
happy because they will not hear it running.
There are several sizes of power station to fit your needs.
Learn more about these quality power stations.
|
Beets in a bucket.
|
|
It is time to harvest the beets in my bucket. The bucket
also had a celery plant that popped up. The celery plant did well as a plant that came up
by its self. I did get 5 good sized beets from the bucket. I might have over done thinging
when I thinned them for beet greens. 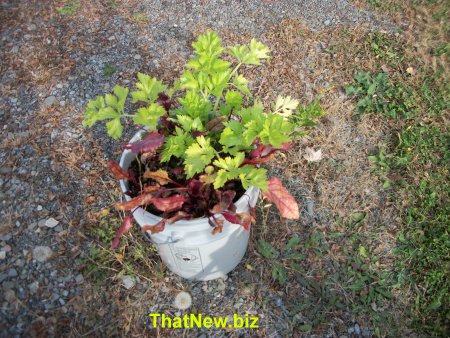
I pulled the 5 beets out and cleaned off most of the dirt.

I took them in the house and washed the rest of the dirt off. Put a pot on the stove with
water and brought it to a boil. While I was doing that I cut off the tops leaving about 1
inch and put ice and water in the sink. I put the beets in the boiling water for 5 minutes
took them out and right in the ice water in the sink. Then I took off the skins sliced
them up and cooked them. I had a few for my supper that night.

I like the Cylindra beets because they make more even sized beet slices. They also have a
good taste.
I don’t have as much luck with growing in buckets as I would like. Quite often I
would find the buckets dry needing water. I think they would have done better if I had at
least checked them every day even if it had rained.
Medicinal
Garden Kit
|
Raised Bed Garden
|
|
I decided to get a raised bed garden to make it easier to
work a garden. I looked at a lot of them and found one on sale at lows. If I bought 2 of
the 12 pc kits I could build one to the size I was looking for with extra corner parts to
make an extra circle. With the 2 kits I could get one 3 � feet wide by 10 feet long
and this one is 17 inches tall.
I got the two boxes opened one and started putting it together. Because my hands
don’t work as good as they use to it was almost imposable for me to get the screws,
washer and nut together while holding the metal panels. If I only had one more hand.
The screws, nuts and washer are stainless steel but the screws had a little bit of
magnetism to them. The screws were an Allen head screw. I went and got a small neodymium
magnet stuck it on to the Allen wrench to hold the screw on to the wrench.
I then stuck it through the hole in the panels and found
out the panels were also magnetic.
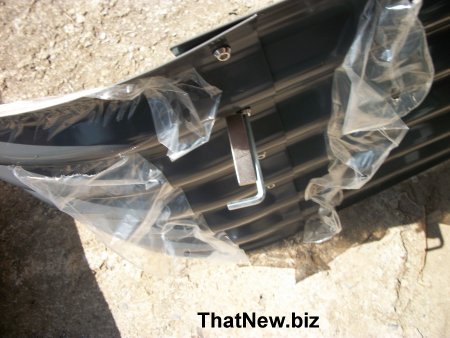
This held the screw tight agents the panel leaving the
screw in plain sight. It was almost like getting the third hand I needed to put this
together.

I started putting two panels together so I would have less
to do when I put them in place. I used a 10 mm socket on an extension to screw the nuts up
hand tight.

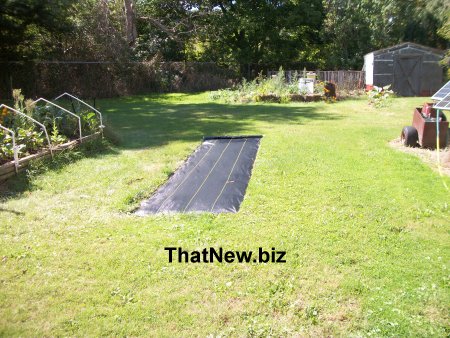
I went out where I was going to place the raised bed
garden and put down fabric to place it on.
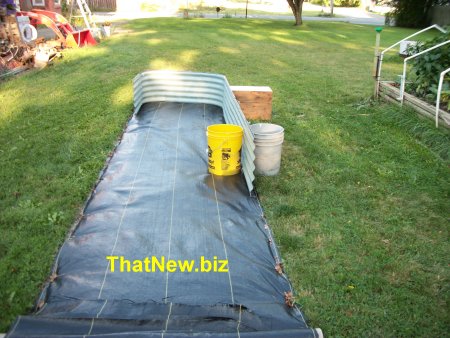
I took the parts out and started putting them together.
Because the screws were only hand tight and the side are longer that they would be if it
was just one kit. I had to find something to hold the sides up while I was putting it
together. I took 2 5 gallon buckets and filled them half way with dirt and found that
would do the job.
I finished putting all the sides together. Then went
around and tightened all the screws.
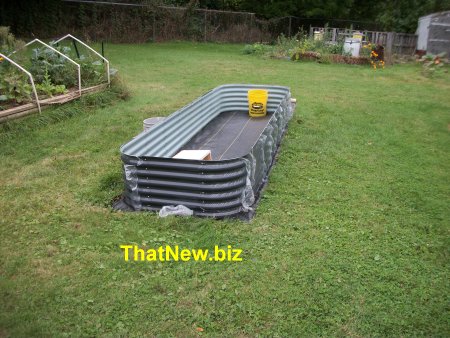
It took me about 2 weeks to get this far. Now I need to
get it filled so it can settle over the winter.
|
Walmart
for the Holidays
Zucchini
|
|
This year I planted zucchini in my large garden. I
planted the seeds in the holes in the fabric along the east end of my garden. I put 2
seeds in each of the 5 holes. 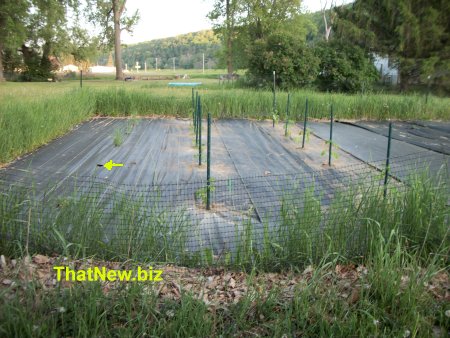
The plants started out good and started producing fruit.
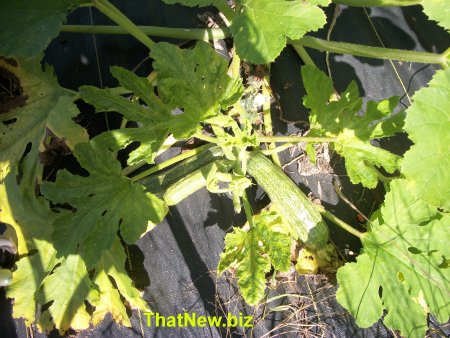
Zucchini plants will produce a lot of squash as long as you keep picking them before they
get big. I try to pick my zucchini between 8 and 12 inches long. This year I got enough
for myself. Usually I get so many that I have a hard time getting someone to take all I
produce.
This year I had squash vine borer that attacked my zucchini and the plants died early. The
squash vine borer lays eggs at the base of the plant. When the eggs hatch the larvae bore
a hole into the stems and eat their way up the stem hollowing out your squash stem. This
will stunt or even kill the plant. They then bury themselves in the soil to emerge as an
adult the following year. That is why it is best to plant your squash in a different
location if you can.
In the past when I had planted zucchini without using fabric, the zucchini would sometimes
start new roots along the stem and keep growing. It is nice to have the fabric so you have
less to weed. But there is something that the fabric does not help with.
Zucchini is a great plant to grow because it can be used in many ways, casseroles, stuffed
zucchini, zucchini bread, zucchini fritters, zucchini grilled, stir-fry, and many more.
Next year I will plant in a new spot and keep an eye out for the squash vine borer.
Time to stock up on canning
supplies before they run out.
|
|
|
For more post from 10/27/23 to 2/23/24 go to https://thatnew.biz/pg3.htm
For more post from 7/7/23 to 10/27/23 go to https://thatnew.biz/pg2.htm
For more post from 12/9/22 to 6/30/23 go to https://thatnew.biz/pg1.htm
email garys blog,
your email may be added to our blog.
|
|
I am 69 years old and have been doing websites for over 25
years. My first website is WESTNY.com . I had a website
business GLASSMARBLES.com for about 22 years. I had to stop that business because of my
health. I have to use a walker to get around so I am limited to what I can do. I am doing
a blog on this site THATNEW.biz. I am going to use this because I already own THATNEW.biz
and going to use it as a blog. I use to do gardening, keep bees, building things and other
things. This will give me something to do to keep my mind active. I hope this will give
you insight to what older people like to do. 12/12/2022 |
|
|
Bookmark and stop back soon. Share this blog with your
friends.
|