I may earn a commission when you buy through the links on this blog. |
|
| Follow
us on Facebook Looking For Passive Income |
|
Slugs and Snails |
|
| Are you looking for a way to rid your garden
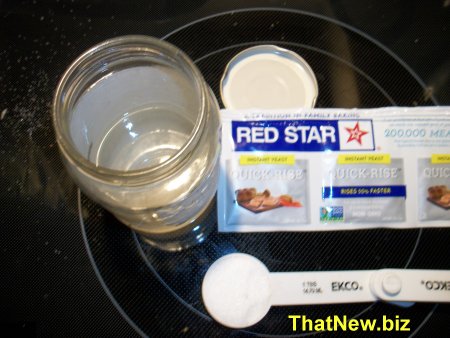
slugs and stop them from damaging your plants? Slugs cause serious damage to vegetable plants. Overnight they can destroy an entire crop of lettuce, or chew hole after hole in cucumber plants, tomato plants and more. What makes slugs so difficult to defend against is that they can do all of their damage almost completely out of sight. Slugs are night-shift workers, coming out in the moist, cool temperatures of the overnight hours to feast and dine on almost anything with greenery. In the morning they are usually nowhere to be found. As the sun begins to rise, slugs take cover on the underside of leaves or bury themselves in the soil below the very plants they love to eat. I get up and out to your garden just as the sun is coming up. I can find them on your plants or trying to get back under cover. This is a good time to get out and pick them off the ground or your plants. Just drop them in a container of soapy water and they will drown. I have heard you can put beer in a container at night and they will crawl in to get a drink. I hate to go buy beer just to get rid of the slugs. So I tried a cheaper way to see if it would work. I took a jar put 1 tbs of sugar about 1/3 of a pack of yeast added water to fill the jar about half way.
I gave it a good shake and let it sit to work till just before dark.
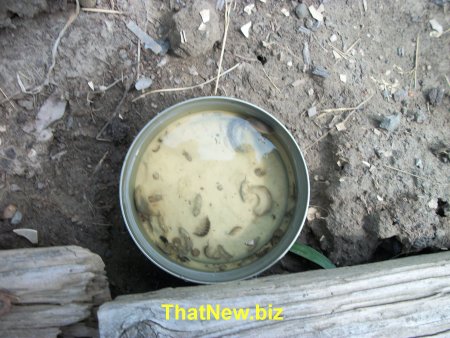
I took a couple tuna fish cans placed them in the garden a filled them with the sugar and yeast mix. In the morning I went out to see if that would work.
As you can see I got a few slugs on the mix over night. I am going to use this as it is cheaper than buying beer. You can also use corry's Ready-to-Use Pellets Slug and Snail Killer, If you don't want to try my way. |
|
Time to cut off my garlic scapes. |
|
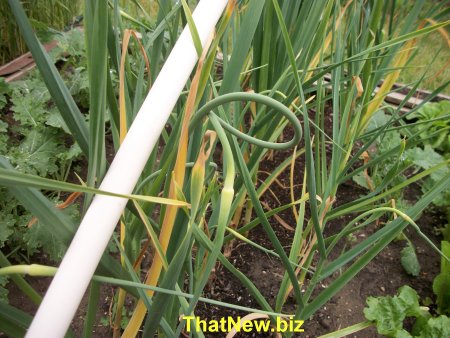
| When I went out to do some weeding I noticed
that the garlic had grown out the scapes. I like to cut them just as soon as I see them
start to curl. If you wait too long, you will end up with a woody stem. More mature scapes
are still edible, but may need to be cooked longer to make them tender or used for flavor
in stock.
Here is some I harvested.
I like to cut them in about � inch length and put them in my home fries.
Garlic scapes are the long, slender flower stems that grow from the top of hardneck garlic (the type of garlic that typically grows in colder climates like here in New York State). Up until recently, these stems were simply considered a by-products of garlic farming. The scapes are cut off to let that energy of the plant go in to larger garlic bulbs. It was found out that these scapes are an amazing way to add garlicky flavor to your favorite dishes. They're a bit milder than garlic cloves, which make them the perfect base for pestos, an addition to quiches, or even eaten straight up sauteed with a little salt. There is a lot of uses for garlic scapes and if you have a lot you can freeze them for later use. |
|
Planting more seedlings |
|
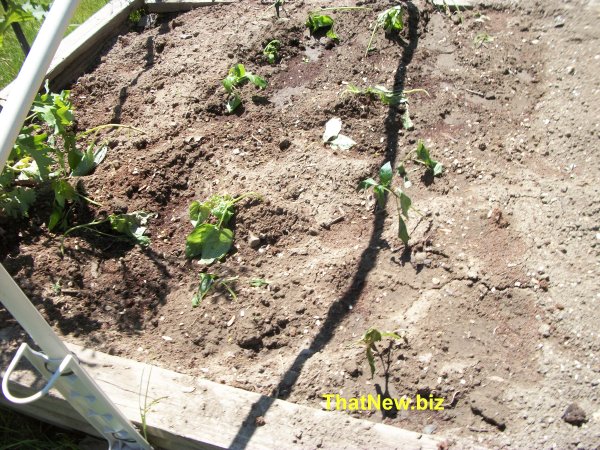
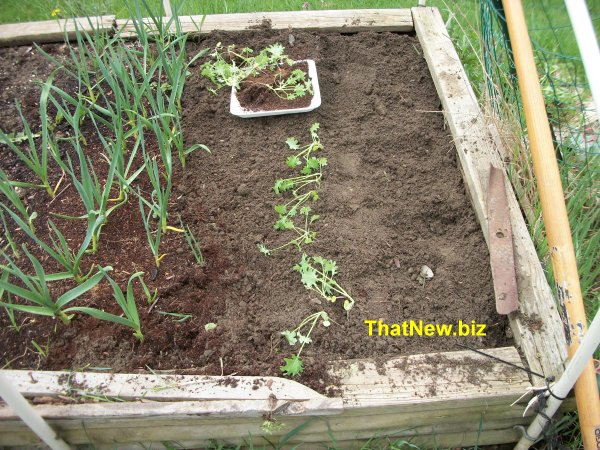
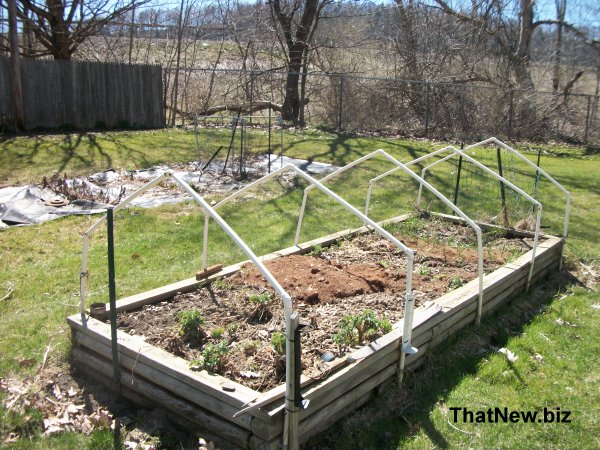
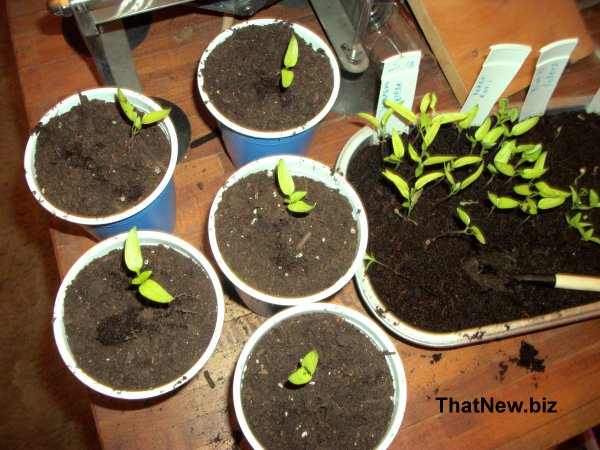
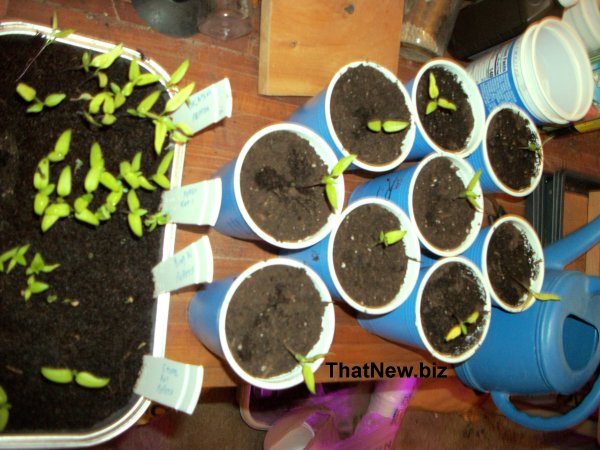
| It past the time I would usually be
transplanting the seedling outside but it has been dry and we had a late frost. It is
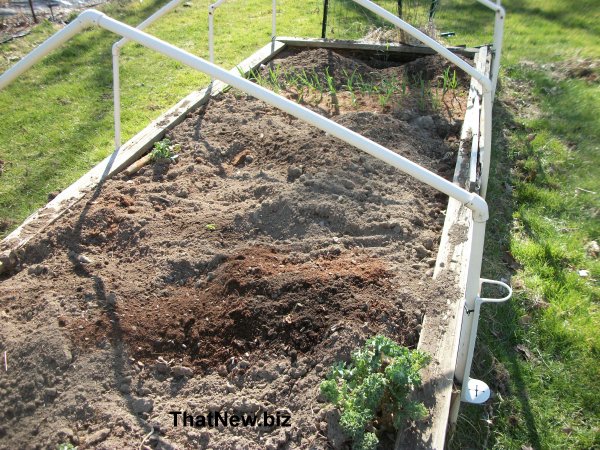
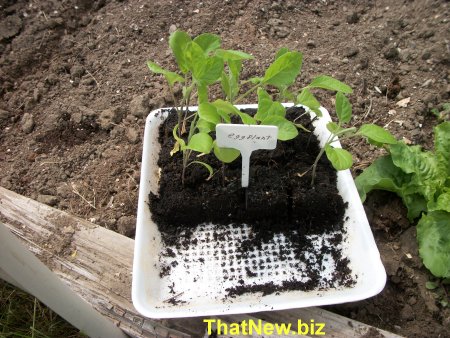
going to rain in the next few days so I wanted to get these planted before the rain. First I planted the eggplants in my raised bed garden. They were a nice size for planting.
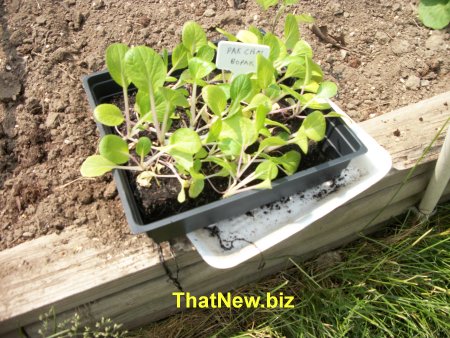
Second I planted the Pak choi . I think they could have been a bit bigger to plant outside.
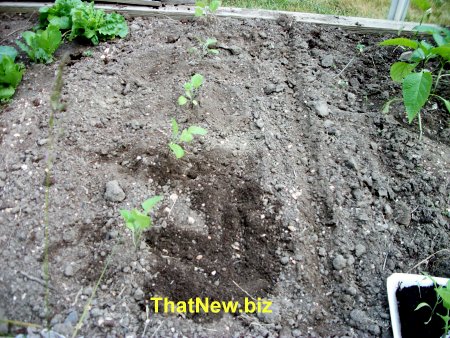
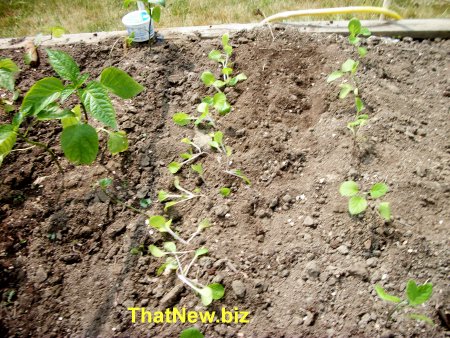
Pak choi vs Bok choy Bok choy has a thicker stem and larger leaves than pak choi, with thinner stems and smaller leaves. Pak choi is often used in stir-fries and soups, while bok choy is commonly used in Chinese cuisine and is a staple in dishes like hot pot and dim sum. Then I planted out some lettuce a day later. It rained a little over night, just enough to darken the top of the soil. These lettuce seedling might be a bit smaller than I would have liked them to be. I wanted to get them in the ground as it is going to rain on and off for about a week.
The lettuce to the right of these seedlings were transplanted about a 2 weeks earlier. I might be able to pick some of those next week.
Become Self Sufficient on 1/2 Acre |
|
Potatoes |
|
| I live where there is a lot of large potato
farms, so getting potatoes is not a problem. I don’t plant potatoes in my garden.
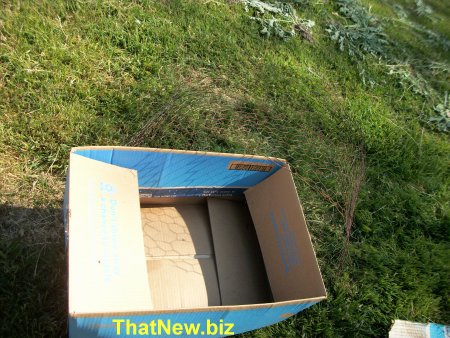
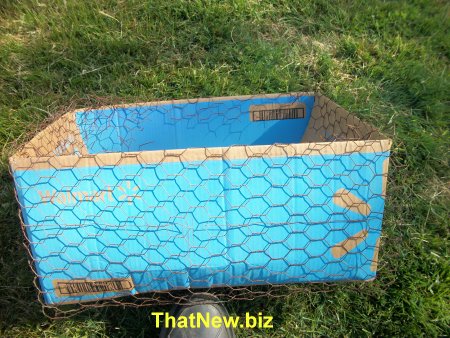
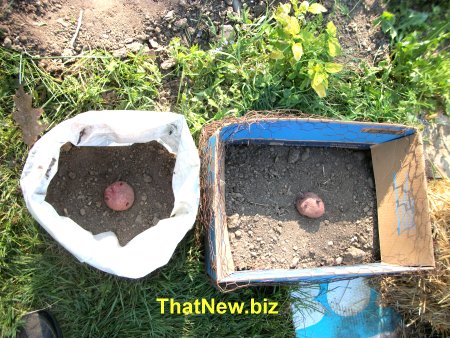
With the drought that we are having, at some point Potatoes may be hard to get. I had 2 red Potatoes that were starting to sprout. I have heard of 2 was to plant potatoes if you don’t have much room. I thought I would give them a try. One way was to use a cardboard box and chicken wire to reinforce the box.
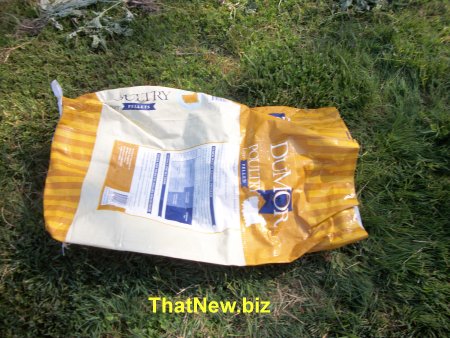
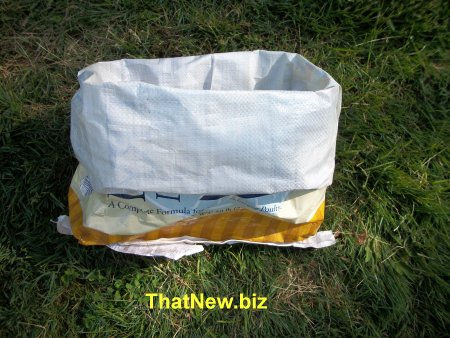
The other way was to use a feed bag.
Folding the sides down so about � of the height of the bag is left.
I took a cardboard box and lined the outside and bottom with chicken wire.
Put some dirt in the bottom of the box and bag. I then added one potato in the bag and one in the box.
I covered them up with about 2 inches of dirt. If they start growing I will keep putting dirt in the box and bag. I will unfold the bag and keep adding dirt until the bag is about � of the way full. This fall I will empty the box and bag to see how things went.
Back in 1888 my great, grandfather invented a potato digger. My dad remembered where some of the parts to that potato digger wear. He wanted to restore it to the way he remembered it was as a child. Here is the history and what he did. Keep clicking on the right arrow on the bottom of those pages to read the full story.
|
|


Planting Tomato seedlings |
|
| There is three ways I planted tomatoes this
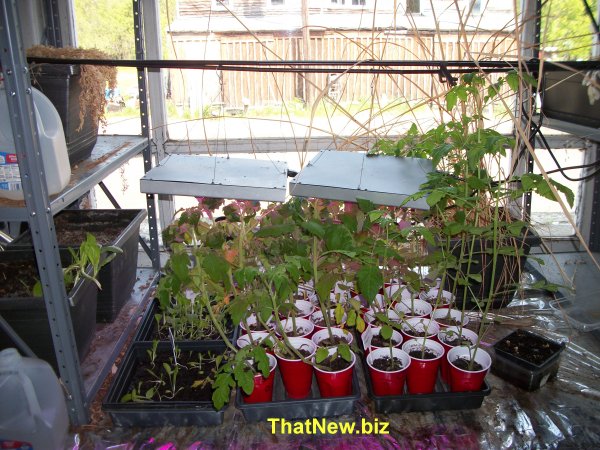
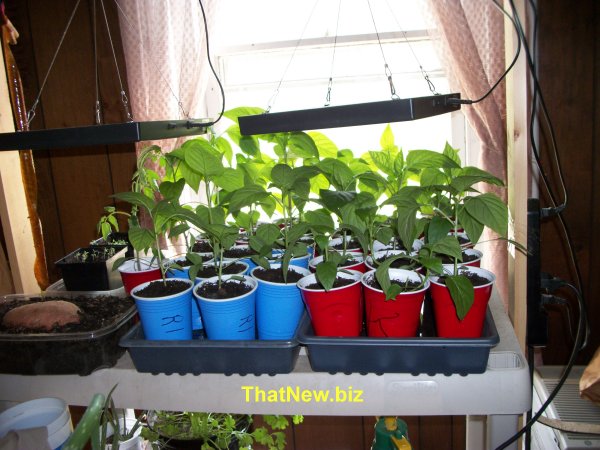
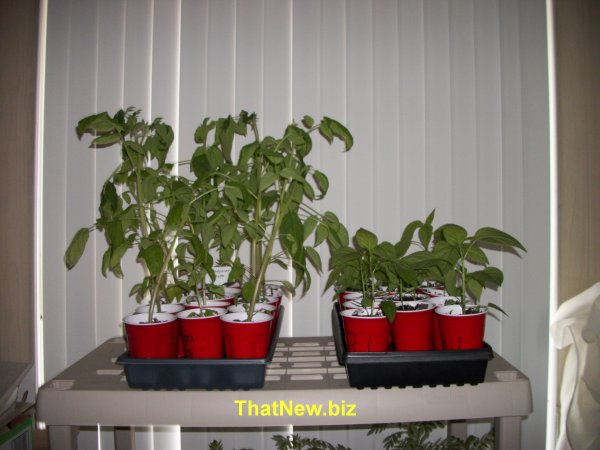
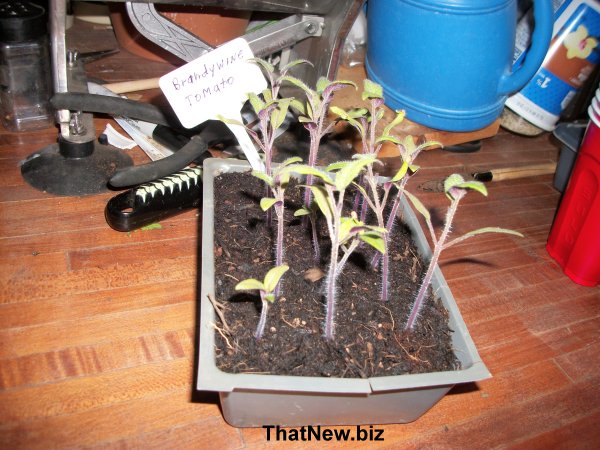
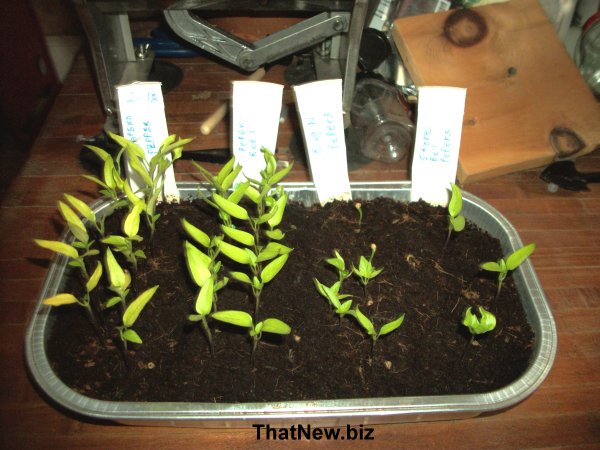
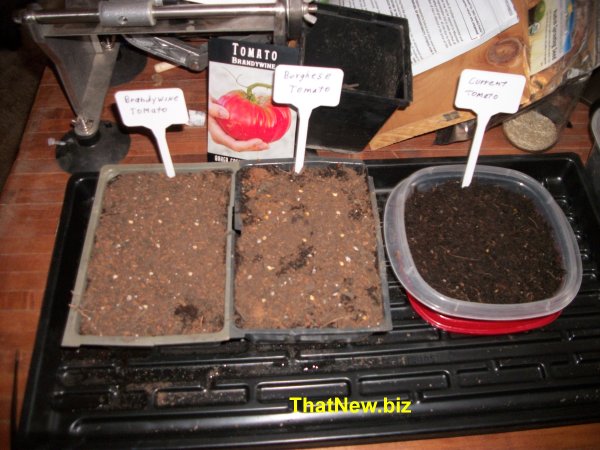
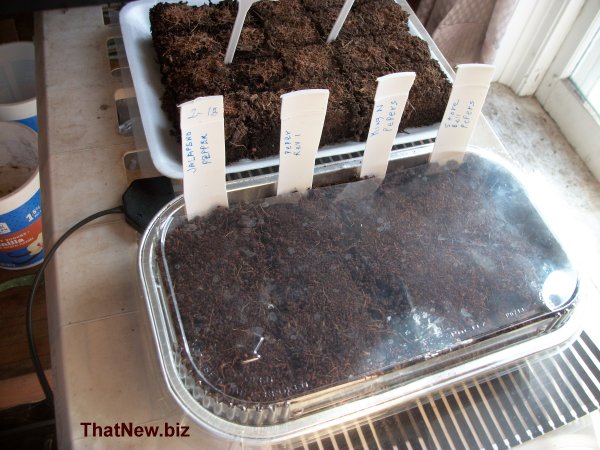
year. I would have liked to have better photos but not being able to stand or move well these will have to do. Once again I planted my seeds too early and they got much bigger than I was hoping for. These photos were taken on 5/18/23 and it will be 2 weeks before I will be planting them. I think I will plant the seeds about 3 weeks later next year. This photo is of the Brandywine Tomato and Jalapeno peppers
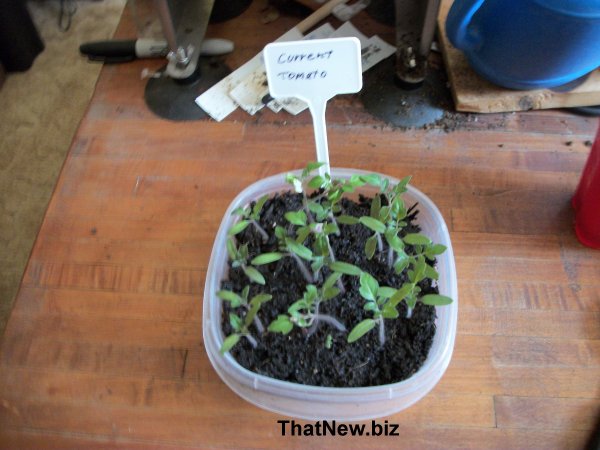
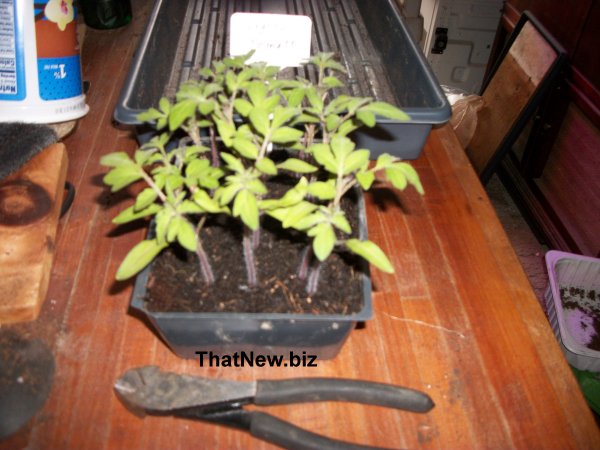
This photo is of the Borghese Tomato on the left and the Tess Land Race Currant tomato on the right.
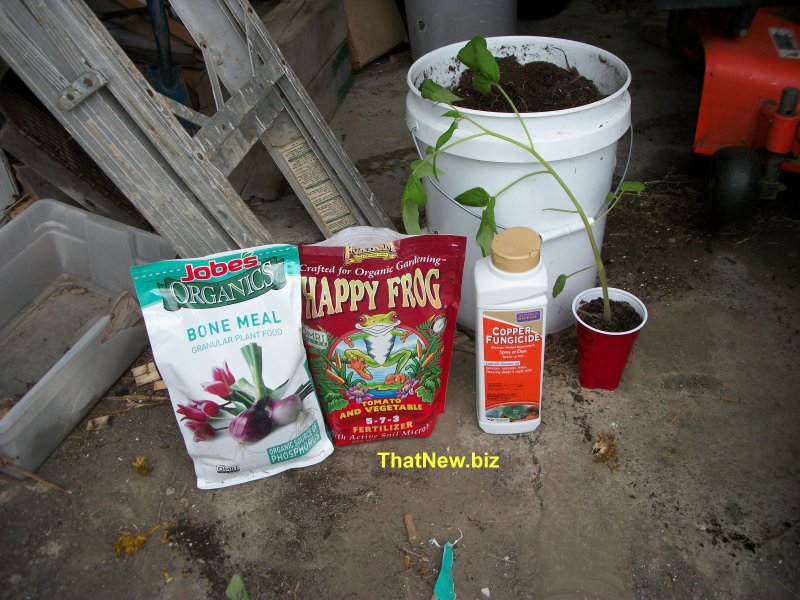
This year I spent a little extra on things that are suppose to make healthier and bigger tomatoes. All my tomato plants will have the following items added to the soil when I plant them. Happy frog vegetable fertilizer and bone meal, and some copper fungicide.
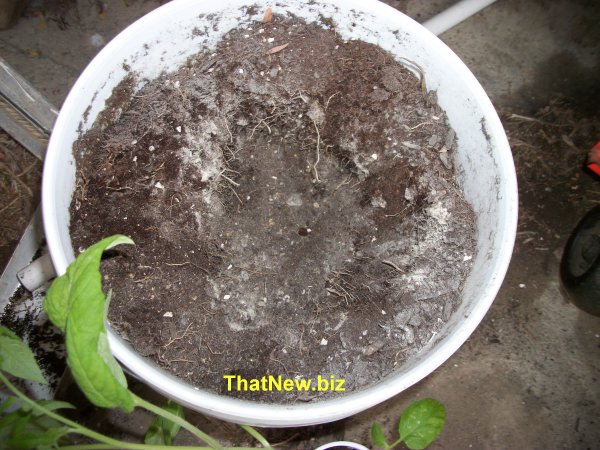
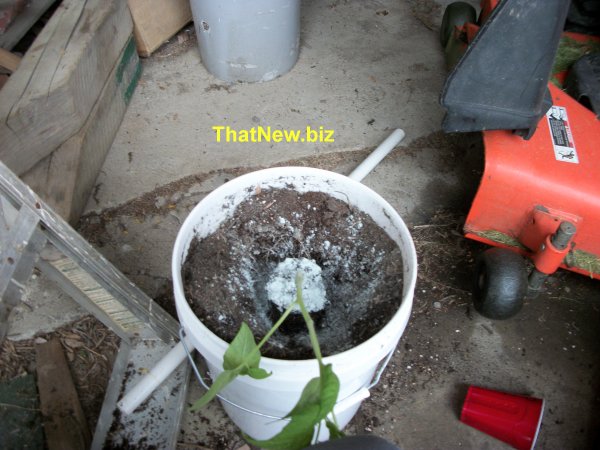
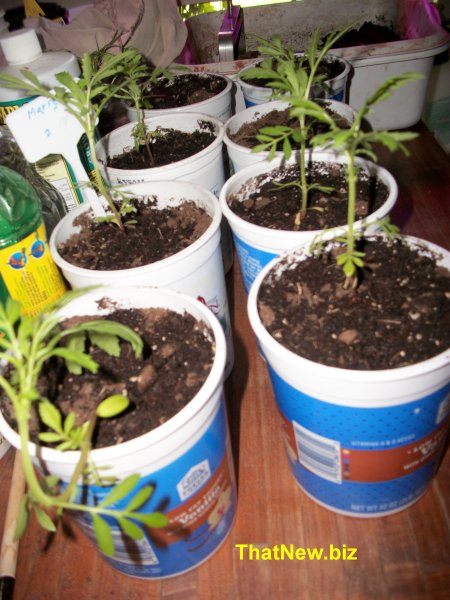
The first way I planted was in a 5 gallon bucket. In the bucket I had topsoil coco core and potting mix. I dug a hole about half way deep in the bucket and added about 1/4 cup Happy frog vegetable fertilizer and bone meal, and some copper fungicide in the hole.
Took off the bottom leaves and placed the plant in the bucket. I covered the plant up to about 1 inch from the top of the bucket.
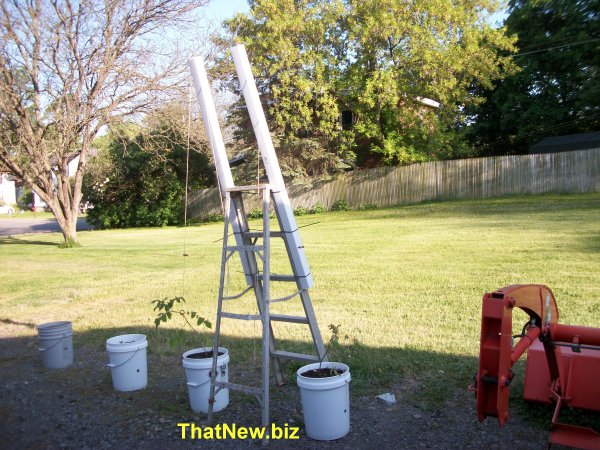
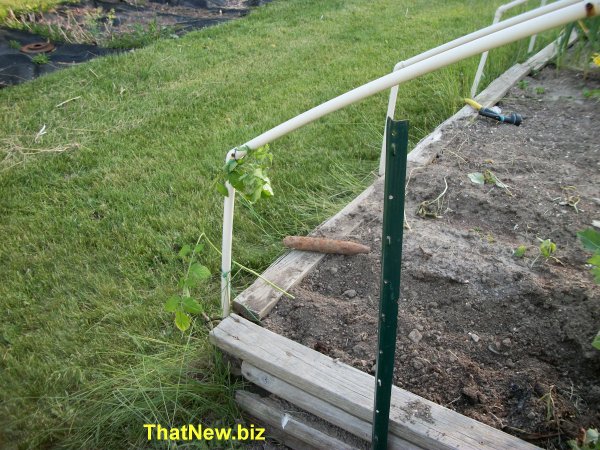
I planted one plant each of the Brandywine Tomato and Tess Land Race Currant tomato in the buckets. This should give me some fresh tomatoes to eat and snack on. I used what I had and could get at and made a trellis I could tie the tomato plants up to. I had an old 5 foot step ladder that was no longer safe as a ladder. I wanted it to be higher than that so I cut in half a square plastic down spout and zip tied it to the ladder. I drilled a hole near the top and tied a string through the hole down to the bucket.
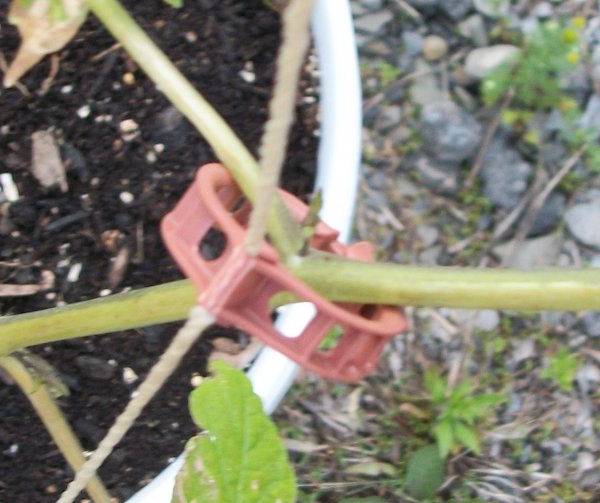
I used plastic trellis clips to support the tomato plants. These trellis support clips are reusable, inexpensive and I think they are the best way to tie up tomato plants. I got my clips from Wal-Mart, they come in a bag of 100.
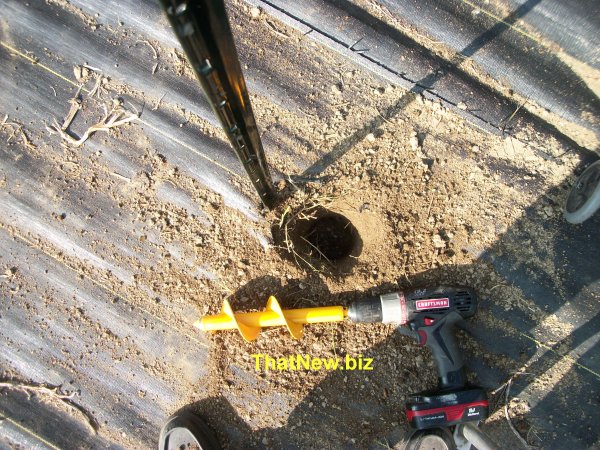
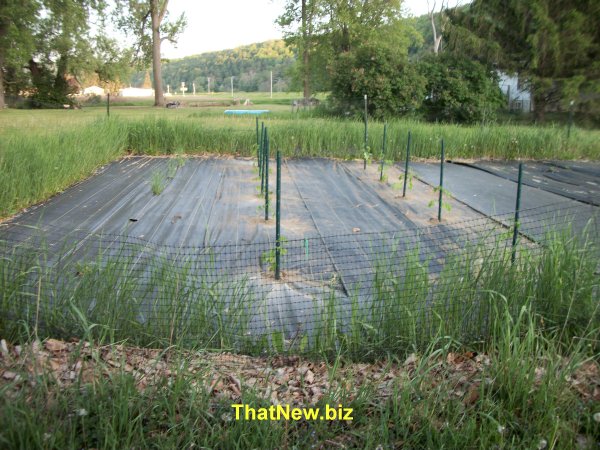
I have a larger garden where I had plastic fabric put down so I will not have to do a lot of weeding. I planted 10 Borghese Tomato plants there as I hope to dehydrate them to use over the winter. How was I going to be able to plant them while having to use a walker. I can’t build a trellis or dig a hole very easily. I used a torch to burn a hole in the plastic fabric. This helps melt the fabric so it will not unravel. I remember seeing a small auger that you can use in a hand drill. I looked for one as I thought I could drill a hole in the dirt. I found an Auger Drill Planter Suits for Bulbs, Vegetables,and potted Flowers. I found this one listed on Wal-Mart . .
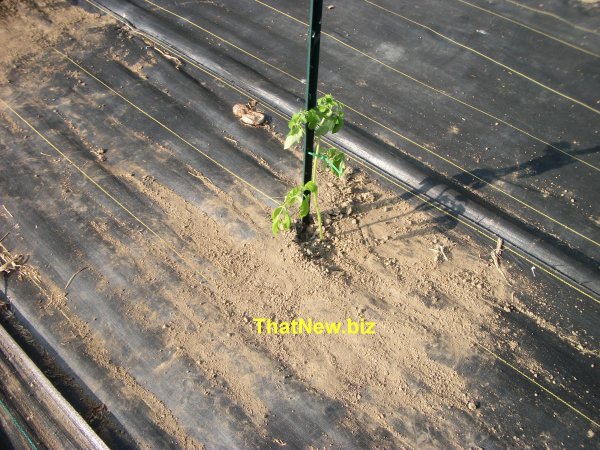
I pounded in a stake and drilled a hole about 8 inches deep, added about � cup Happy frog vegetable fertilizer and bone meal, and some copper fungicide in the hole.
I took off the lower branches, dropped the plants in the hole, used a zip tie to support them to the post, and gave them a bit of water to settle the dirt around the plant.
My 2 rows of Borghese Tomato plants are all planted. Now I could use a little rain because I don’t have water at my big garden spot.
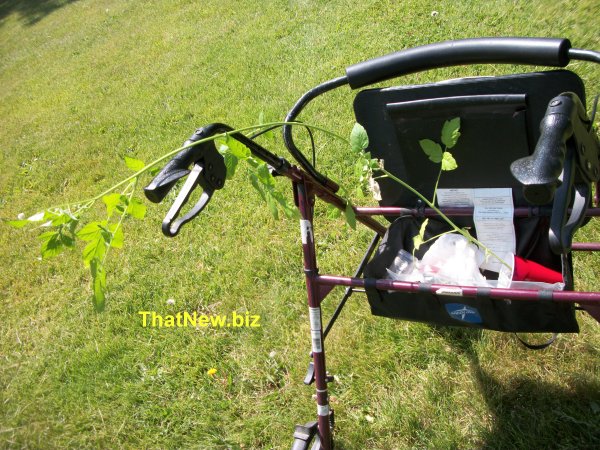
The third way I planted tomato plants is for those long lanky tomato plants One of my Tess Land Race Currant tomato plants was crazy long. It was about 2 1/2 feet tall.
Take several of the lower branches off and lay it down in the trench so about 1 foot of the stem will be out of the ground when you cover the lower part of the stem up.
Tie up the top end.
The stem you bury should grow roots and help the plant
grow big and fast.
This free PDF will teach you how to Unlock Your Wealth DNA
|
|
Early planting peppers |
|
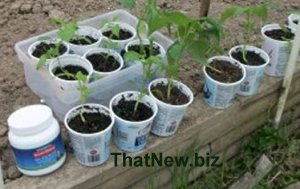
| Don’t believe the long range weather
forecast. Because it is hard to do some of the planting when I have one hand on my walker and one hand to do the planting. I wanted to get an early start on setting out some of my plants. I have extra pepper plants so if I lose a few I can replant. The long range forecast for my town showed the lowest over night tempter over the next week would be 42f and 43f for the 2 coldest nights. It should be ok to start planting some peppers. The peppers look like a nice size to plant them.
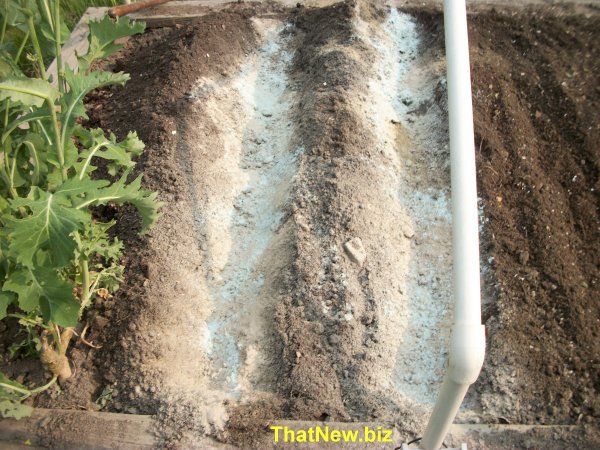
I dug a trench to about the depth of the solo cups.
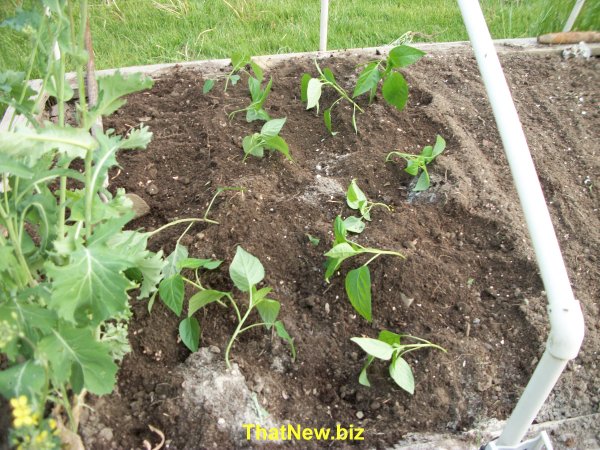
I added a couple scoops of scoops Happy frog vegetable fertilizer (5-7-3) and bone meal, ( about 1 cup each) and some copper fungicide. Then I planted the pepper plants the best that I could.
Then I gave them a light watering. I was hoping they would stand up better in a couple days. All was good to this point, but the weather changed. The tempter that was listed in the long range weather forecast turned out to be 31f then 28f. Well I did not have anything I could get to that I would have been able to cover them with the first night at 31f they looked like they might be able to survive but the second night at 28f the frost finished them off.
Lesson learned do not get in a hurry to set your plants out. Better to be a little late then to early. I will just have to replant them. This morning May 26 2023 is the date I had 28f. Last frost date for Avoca, NY by zip code was listed: You are almost guaranteed that you will not get frost from May 28 through September 23. Become Self Sufficient on 1/2 Acre |
|
Straw Bale Garden |
|
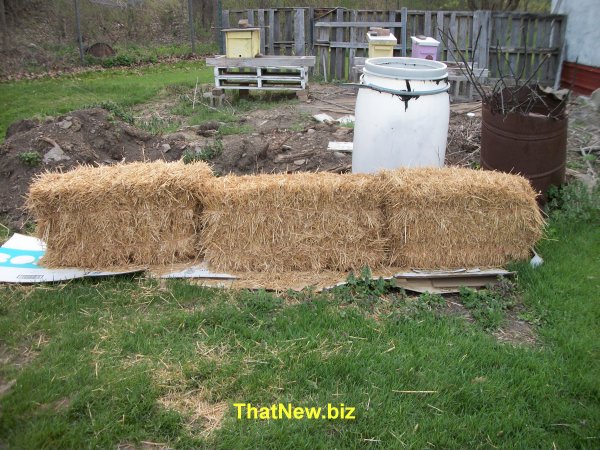
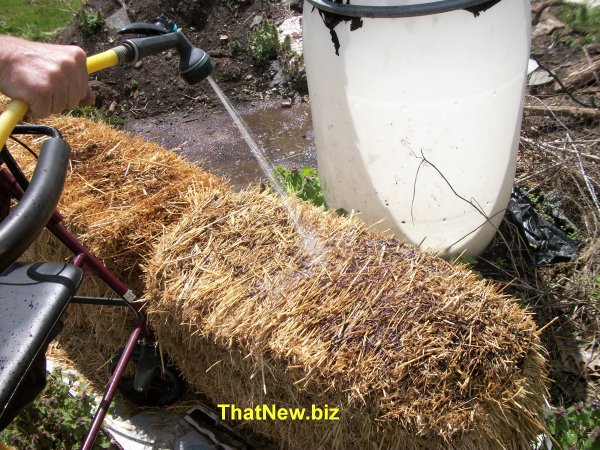
| I hear about straw bale garden so I decided
to give it a try. I bought 3 bales from a local farmer. I chose a location near the back
of my yard. I put down some cardboard first to help control weeds or you could use
landscape fabric. Then place your bales so the twine is on the side of the bales, parallel
to the ground. Don’t forget that the bales will kill any lawn underneath them so this
is a commitment! You also won’t be able to move wet, heavy bales after you start
watering them.
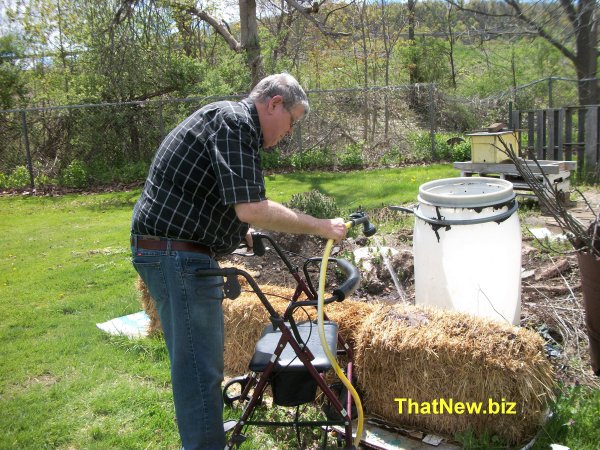
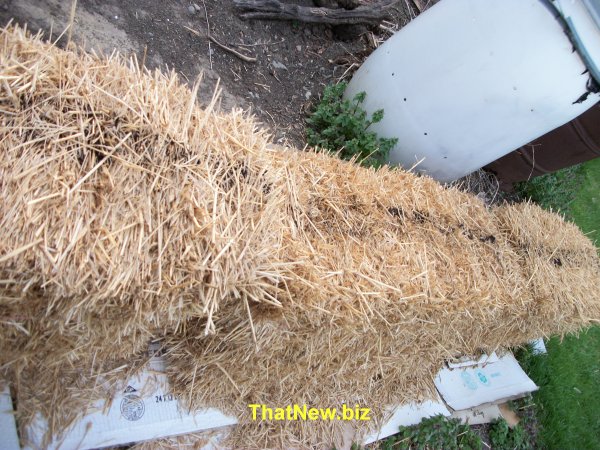
Water the bales thoroughly, and keep them wet for two days.
On day three, I sprinkled 2 cups blood meal a nitrogen fertilizer on each bale (12-0-0) on top of the bale, and water it in.
But do be prepared if you use organic products like blood meal they often take a bit longer to do. I found out later that urea works faster and you use less, 1/2 cup to start with urea (46-0-0) it is a high nitrogen fertilizer .
Continue to add fertilizer and water it in for a total of three days, then cut the fertilizer amount in half on days six through 8, still watering. On day 9, stop adding fertilizer, but keep watering.
The bale will feel warm to the touch because decomposition is occurring inside. Once the bale feels cool in a few days, you can begin planting. Don't do it too soon or the heat may kill seedlings or prevent seeds from sprouting. What grows well in a straw bale garden? Essentially, you can give anything a try, but typically, the veggies that do the best are bush tomatoes, bush beans, and vines such as squash or cantaloupe. Strawberries also do well. Annual flowers, such as marigolds or petunias, can be planted on the ends to dress up your bale. |
|
| oukitel p2001 | |
| I sometimes watch the YouTube southernprepper1. He often has
some good ideas. About a year ago he was talking about how good the oukitel
p2001-portable-power-station was to give you electric when the power goes out. With all
the rolling blackouts being talked about I decided to buy one. I tried it out when it came
in and it was working just like he said. I had a 200w solar panel to hook up to it so I
decided to use the oukitel p2001-portable-power-station to run my grow light to save a bit
on electric. The grow light use a 110v AC plug in to run them. A few weeks ago when I
tried to turn on the AC power, the p2001-portable-power-station, the light cam on then
went right off. I tried several times to get the AC outlets to stay on but could not get
it to work. The first thing I did was go online to see if I could find anything about this
problem a find a fix. One of the links on Google said troubleshooting for the oukitel
p2001. As soon as I clicked on that I got a massage saying I had just got infected with a
virus. After shutting down and restarted my computer and running my virus software I got
my computer back up and running. Next I went to oukitel.com web site to see if I could get
help there. I did a chat by clicking on the chat with us button.
Wednesday April 19 online chat p2001 11:46 AM Wednesday April 19 us.oukitel Hello. Wednesday April 20 sent a reply Sat, Apr 22 at 10:22 AM Wed, Apr 26 at 9:04 AM ( I got this reply from us.oukitel ) Fri, Apr 28 at 5:07 PM ( reached out to where I bought my machine to see if they could help and got this reply) Hi Gary, I've reached out to my representative to see if they can assist you, and will let you know once I have heard back from them. Regards, FactoryPure About May first I found a place on the oukitel web site and filled out a warranty request form but I did not have an order number. Did not hear anything back from that. Fri, May 5 at 11:34 AM ( I hadn't heard back from where I bought the machine
so I sent them an email. Asking If they heard anything back and could I have a copy of my
order) On May 9 at 12:04 I sent a email to :support@oukitelpower.com because no one has replied to me asking them for help. Can you help me with my nonworking Oukitel p2001 serial number XXXXXXXXXXXXXXXX I have attached a copy of my order from where I ordered it. When I try to charge the Oukitel p2001 from my 110v house power it comes up saying it is charged up to 188% see photo.
When I try to turn on the AC power the button lights up and beeps then turns off. It looks like nothing works in AC power in or out. Below is what I have done to try and get some fix for my Oukitel p2001 that has a 2 year warranty. I hope you will get back with me on this issue. I sent a copy of a all I tried above along with a copy of my order from FactoryPure and a photo showing it saying charge up to 188% and the video of how I cannot get the AC power to turn on. As of today I cannot get any help with getting my oukitel p2001-portable-power-station so to me it looks like the 2 year warranty is not true. August 1, 2022 was the date it was shipped to me. As southernprepper1 Says this is a well built machine. They probably are, but IF you have a problem with it, it may be worthless. If you feel lucky they are on sale for $349.00 less than I paid for my machine.5/9/22 I found a reply in my spam folder with an attachment but it is all in Chinese could not open the attachment. No USA shipper that I know of will take a package with an address that is not in English. When I tried to reply and say I can only read English and could not open the attachment I got this (Sorry, we were unable to deliver your message to the following address.) as a reply. I hope you have better luck with Oukitel than I have. If they ever get back with me and fix this I will let you know posted. May 12, 2023 If I buy a new back up power box I will let you know how it works out . |
|
Harvesting worm castings |
|
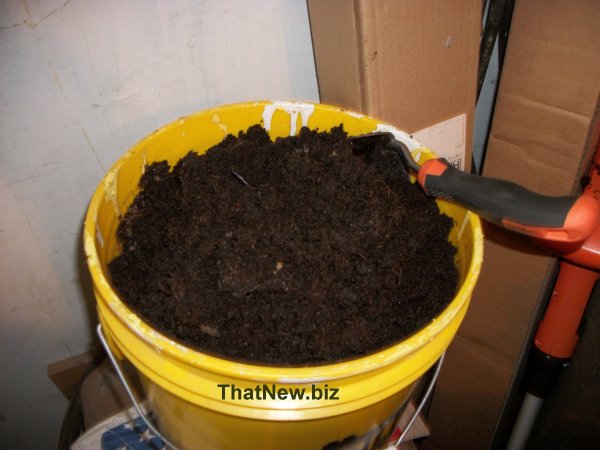
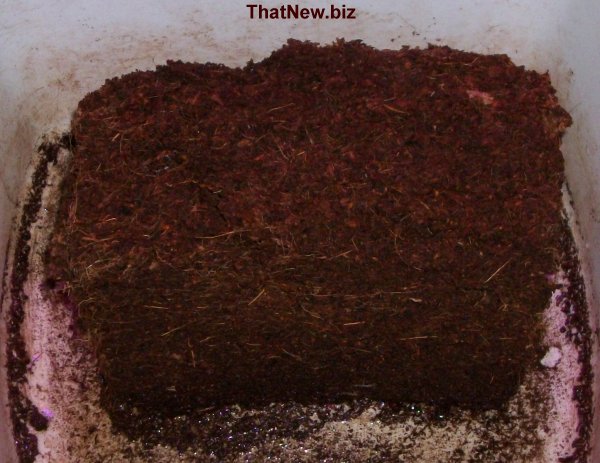
| It’s time to harvest some worm casting from my worm bin. It
has been about 3 weeks since I put any food scraps on the left side of the worm bin. Most
of the worms should have moved to the right side where there is more food scraps for them
to eat. Some worms and a few larger food scraps may still be in this side. I scooped all
the castings on the left side of the bin and put it in a 5 gallon bucket.
The next thing I do is spread out the casting moving it in a thin layer to sort out the worms and large food scraps left in the castings.
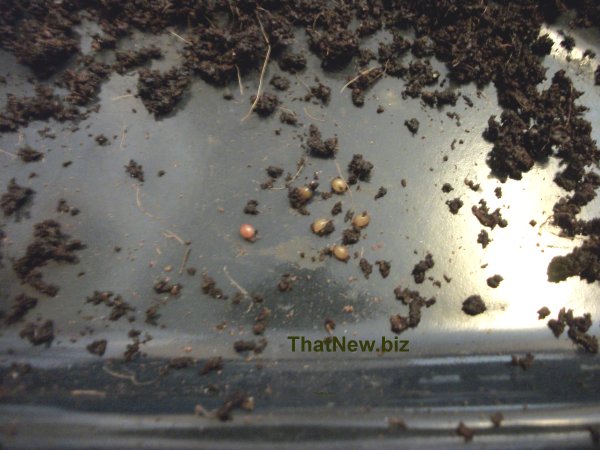
I move from the castings from the right to the left side. The worms don’t like the light so they move to the right and when you get to the end of that pile there will be more worms. I have 2 containers to put the larger foods scraps and worms. If I see worm cocoons I put them in with the worms.
Worm egg cocoons can be found in the castings. When the eggs hatch, those worms now live in worm bin or garden if you don’t sort them out. Studies are showing that earthworms remove heavy metal deposits in your soil. And, of course, they break down waste material in the soil. If the cocoons go in the garden they are also good for the garden. Red wigglers don’t live long in a garden because they eat a lot and may not find enough to eat. Now I have a bucket of casting ready to use in my garden.
I add the food scraps and worms I found back in the worm bin.
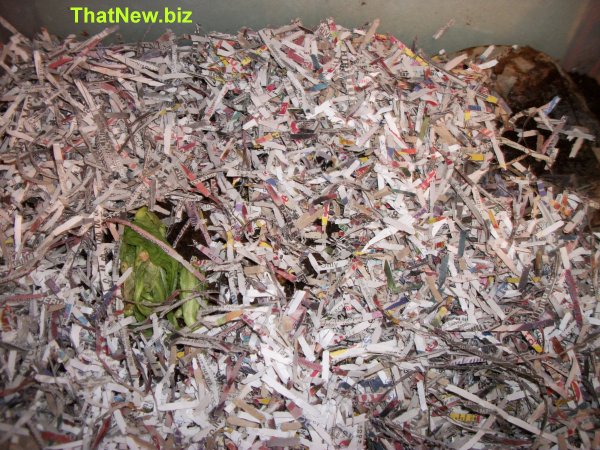
Then I add some new food scraps to them and close up the bin by adding shredded paper and paper over the top. As talked about in my post below, Adding composting worms.
Worms and Worm Casting for sale |
|
Kale and Marigold |
|
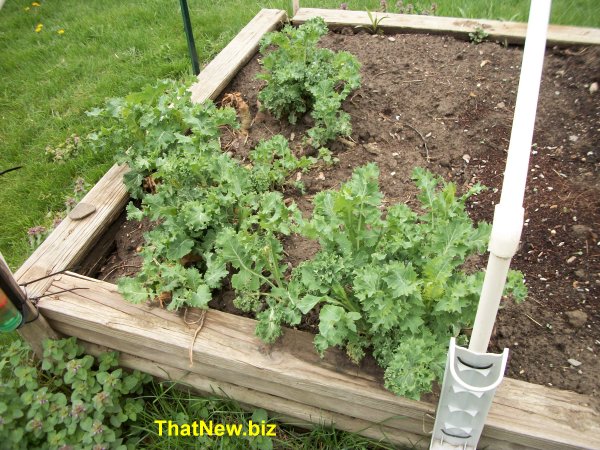
| Time to transplant my Kale and Marigold this
week.
This week I planted my Kale seedlings outside.
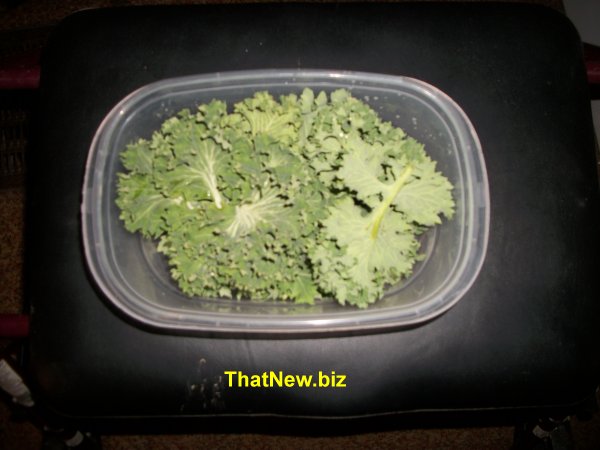
Kale will keep growing after a heavy frost. You may notice a sweeter taste after a frost. Kale is a cruciferous vegetable in the same family as cabbage, cauliflower, broccoli, and collard greens. Often used in a healthy green smoothie kale is full of powerful antioxidants and vitamins. As I mention in my cleanup blog. I had a few Kale plants that survived the winter. They have already grown enough to harvest some for a salad.
I mixed the kale with some romaine lettuce I had growing in my window for a salad that night.
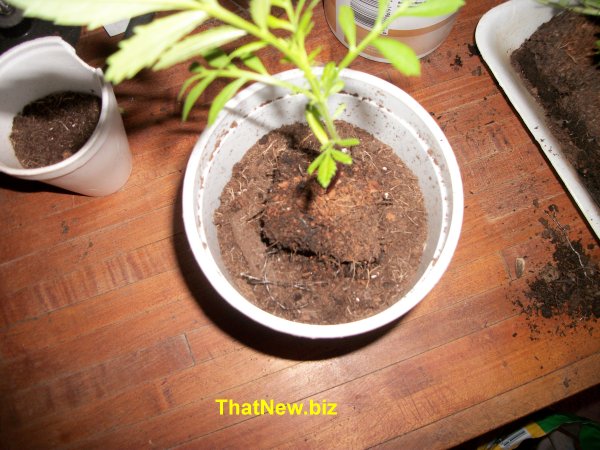
I transplanted the marigolds in a solo cup filling them up to 2 inches from the top. I then placed the marigold root block in the cup.
After that I filled the cup to the top of the cup with potting mix.
This will give them a chance to get bigger when it is time to plant outside after a chance of frost.
Marigolds are the perfect garden companion. They are well suited to landscaping, container growing, and vegetable gardens. These low maintenance flowers don't need much looking after either. Here are a few other reasons why marigolds deserve a spot in your garden. They attract pollinators, deter some pests, and beautify a garden.
|
|
Transplanting Tomato Seedlings |
|
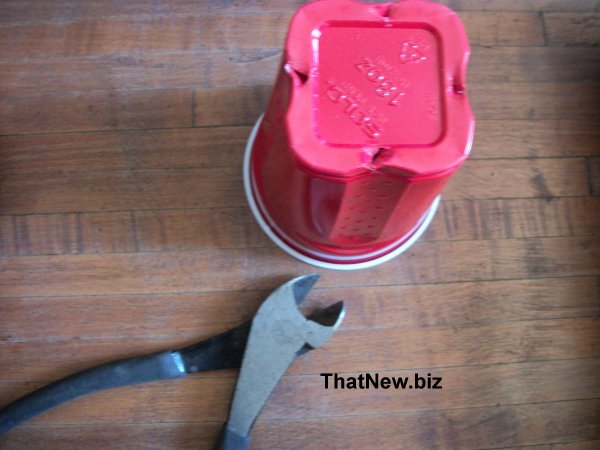
The tomato seeds I planted are now ready to transplant. ( 4/17/23 )
I am going to use some Solo cups I have to transplant the tomato Seedlings into. The first thing I need to do is put some holes in the bottom of the cup. I use wire cutters to do this. Some people use a soldering iron to do this.
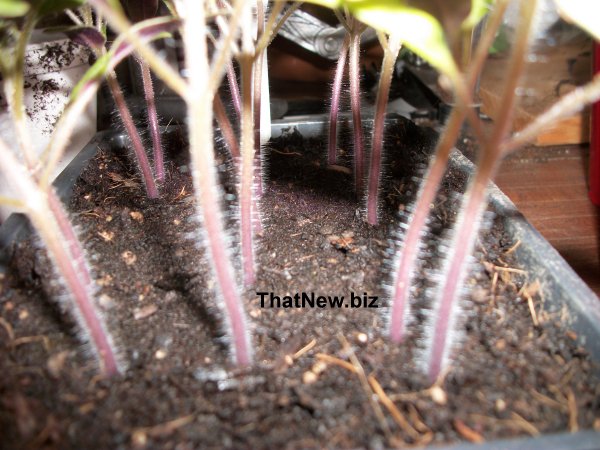
You will notice that the tomato seedlings have some fine hairs on the stem. These hairs will become more roots.
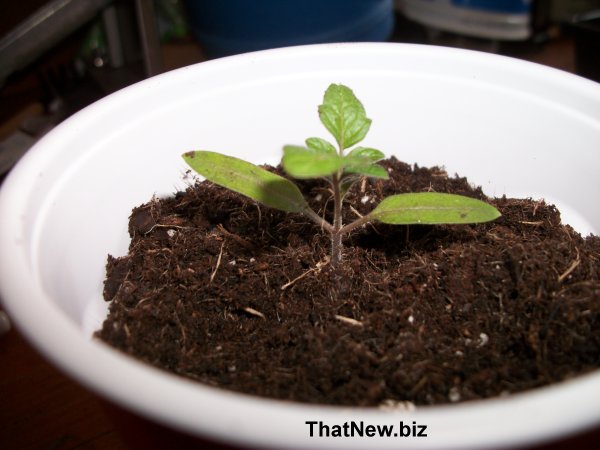
When digging the seedlings out of your starter container try and take as much soil with it as you can. Then transplant the tomato seedlings, planting the stem is as deep as you can. That is so the hair will turn in to roots, making the plants grow bigger and better.
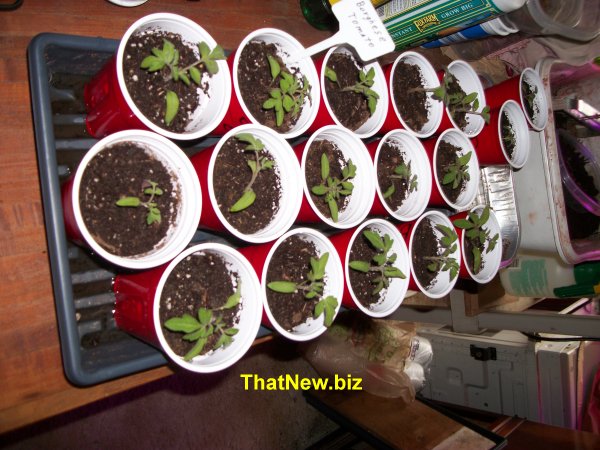
Lightly pack the potting soil down and water the plants. You are on your way to having them grow into plants ready plant in your garden or container.
Can’t you already see you having Juice Tasty Tomatoes |
|
Time to clean up |
|
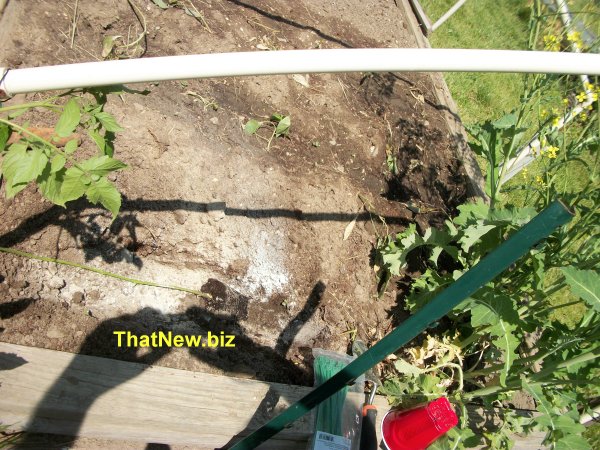
| This week the weather was sunny and the
ground had dried up. This made it a great week to get started on cleaning the weeds and
old dead plants out of my raised bead garden.
The garlic was coming up and a few of last year’s kale plants were starting to grow. I used a spade fork to loosen up the soil to pull the weeds out. This works well so I can get most of the grass roots out. After I got all the weeds and grass out I add a couple 5 gallon buckets of worm casting that I will work in to the soil.
By doing this a bit early, it will let any weeds that might start to be taken out when I go over the soil just before I plant. Just a quick note on last week’s post: The peppers that I transplanted look like they are recovering from the sun burn. Happy Planting. |
|
Pepper update |
|
| As I said, the seeds I had were leftover from last year so I was
not sure what the germination rate was going to be. The Craig’s Grande Jalapeno did
the best followed by the Revolution F1 peppers. They were 1 year newer seeds than the King
of the north seeds and were also a hybrid. The King of the North is heirloom seeds and
being older less germinated. The seeds I saved from a pepper didn’t to very good but
I did get some.
Being old and forgetful I missed watering them a couple days and the sun was very bright at that time. The peppers got dried out and started to turn brown. I hope they can recover. One thing you will learn is, taking care of plants can be a bit tricky. Miss watering, over watering, too much sun, or not enough sun can make a difference in the outcome of your plants. You just need to keep trying and not give up.
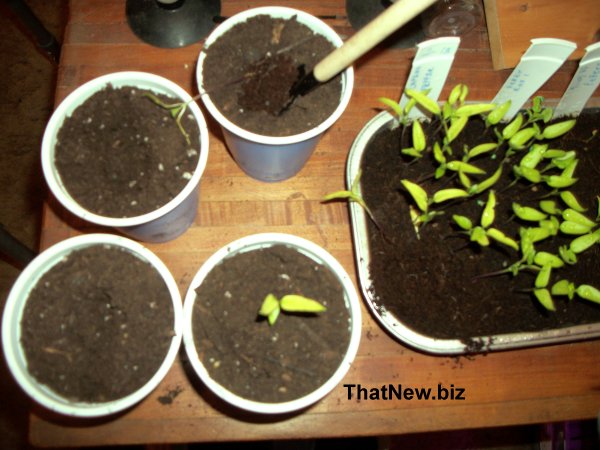
I took some large plastic cups I had put small holes in the bottom and fill with potting mix. I transplanted what I want to put in my garden. You need to carefully dig up the roots and plant roots deep in to the new larger container.
Water them well so the roots will get a good start in the new soil. I will transplant the rest next week after I get some more potting mix from Wal-Mart. That way I will have some plants to give to my neighbors.
|
|
Garbanzo Sprouts |
|
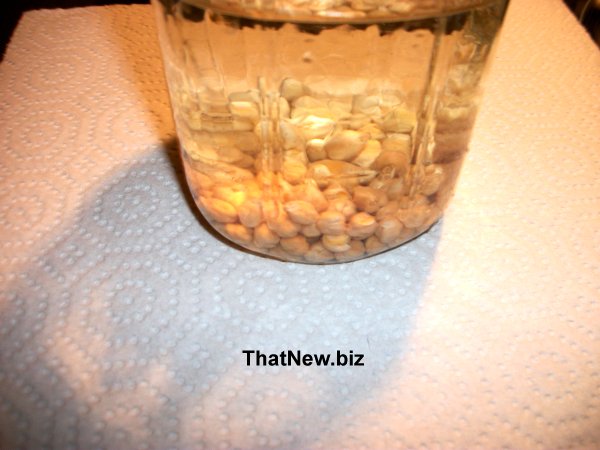
| Garbanzo bean sprouts also known as, Chickpea sprouts, are a
protein-rich, enzyme rich, high-carbohydrate food. To sprout these legumes soak the
Garbanzo in water 10-12 hrs.
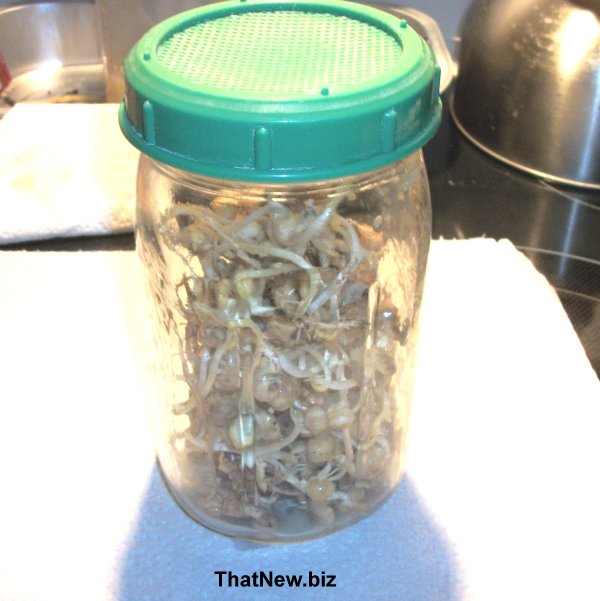
Then rinse and drain the Garbanzo three times daily until there are sprouts, which look like white tails.
Garbanzo beans are a popular and nutritious staple in the Mediterranean diet. Garbanzo bean sprouts are easy to grow and delicious for snacking or adding to a variety of dishes.
E-Book Easy cooking for beginners
|
|
Get Paid To Use Facebook,
Twitter and YouTube. This free PDF will teach you how to Unlock Your Wealth DNA |
|
Starting Seeds |
|
| This is time to for me to start seeds inside for seedlings. (
3/18/23 ) I planted 3 types of Tomato seeds. Tess Land Race Currant Tiny Tomato, delicious, red fruits are popular with home gardeners. This variety can vary in color; most are deep red but some are also rose, gold and yellow. They have a lot of fruit that you can grab a hand full of to snack on when working in the garden. I give some of these plants to friends as one plant can provide a lot of this tasty treat. Brandywine Tomato. The Brandywine varieties are some of the most popular heirloom tomatoes grown in North America. They are known for their large fruits, great taste, and pumpkin-like ridges. The distinctive potato-leaved foliage sets them apart from most other varieties of tomato. They do not have a long shelf life, canning, pickling, saucing, and drying are recommended. Borghese Tomato. This tomato produces short determinate plants that prolifically yield big clusters of 1-2 oz. red, plum shaped, crack-resistant paste tomatoes that are a great substitute for Roma tomatoes. Tomatoes are prized for drying because they retain more flavor than most other drying varieties. This will be the first year to grow this type. A good friend gave me these seeds that she saved from last years tomatoes.
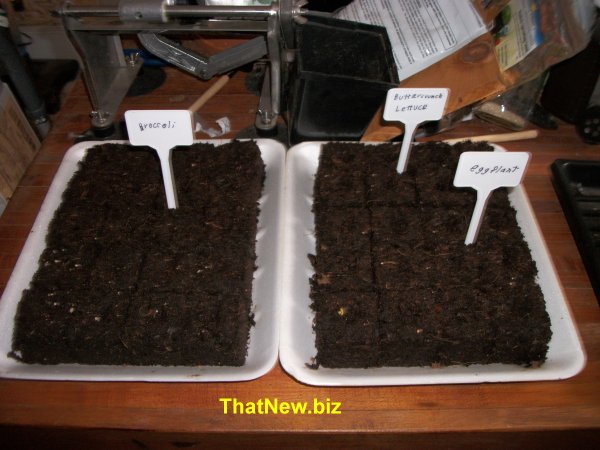
I also planted Broccoli, eggplant, and crisp mint lettuce. Waltham 29 Broccoli A delightful standard variety known for its excellent flavor Standard type, produces 4 to 8" green heads that are nicely flavored. Compact plants also produce some side shoots that produce some florets Little Finger Eggplant I have never eaten or planted any eggplant but thought I would give them a try. I ordered these seeds not knowing anything about eggplant. You can start harvesting when they are only as big as your finger or let them get bigger. Either way they will taste mild and sweet. Very productive. Great in stir fry or grilled. I will see how they do. Crisp Mint Lettuce, a large romaine type, succulent, mint-green outer leaves surround crystal-white hearts, mild, sweet and crunchy in flavor. Succulent heads to 10 inches in height are a standout in the salad garden.
|
|
Strawberry Seeds |
|
| This year when I was ordering my seeds to plant. I came across
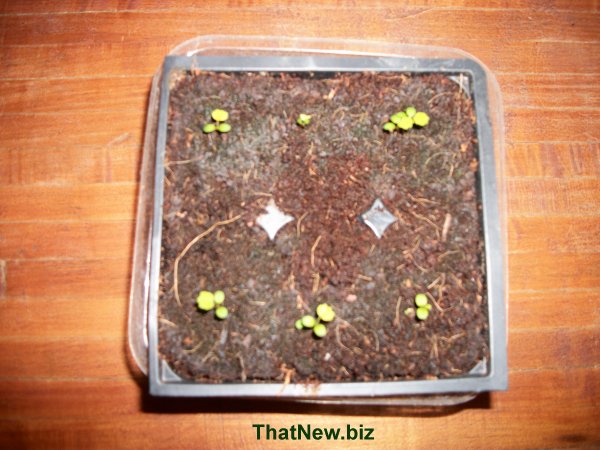
Berries Basket White Hybrid Strawberry seeds and decided to give them a try. They are an ever-bearing, compact and bushy plants produce large, deep red, full-flavored berries until first frost. White flowers and shiny, deep green leaves on strong vigorous plants. This Strawberry is Well-suited growing in baskets. They may not produce strawberries the first year. I wanted to get an early start so I got the seeds out to plant them. The package said that before planting the seeds they should be cold stratified for a month to help them germinate. I did not want to wait a month so I put them in the freezer for a 2 days. I was hoping that would be better than not doing anything. I after a 2 days in the freezer I planted the seeds and hoped they would germinate. After 2 weeks I thought I could see a couple tiny spots of green. Here is what they look like 1 month after I planted the seeds.
I only had 10 seeds so I think this is a good start. Most people will buy Strawberry plants to put out, but I just wanted to see if I could do it from seeds. I will let you know how they are doing at a later date. If you have not ordered your seeds for this years planting, you better hurry. I have noticed several seeds are sold out already. |
|
Adding Composting Worms |
|
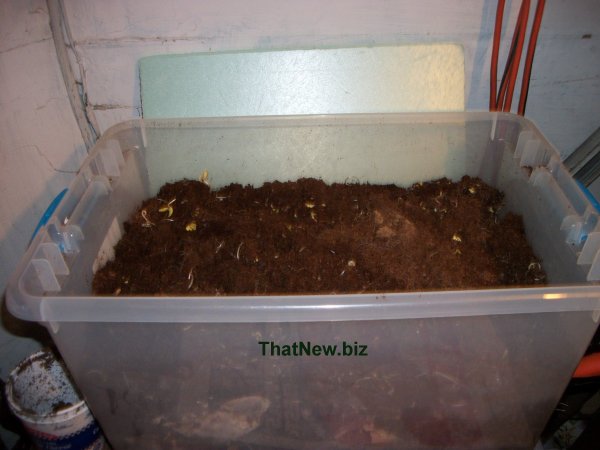
| Why I am adding more red wigglers to my
compost bin. Composting worms, or Red Wigglers, are not picky what they eat. They will happily digest a wide variety of organic plant material into nutrient rich worm castings. You can put coffee grounds, old lettuce, rotten vegetables, potato peels, fruit, grass clipping, and leaves almost anything that is plant material. You can add some ground up fine egg shells to give them some grit. They need a bit of grit to help break down the food scraps. The eggshells provide calcium, which reduces acidity in the bin. You should NOT give them any meat, seafood, poultry, dairy, oily, or spicy stuff. After about 4 weeks of not feeding them they will start to die. I was not able to feed the worms in my worm bin for a few months because of health issues. Most of the worms must have died and what few were left could not keep up with the coco coir and food scraps I am giving them. I decided that I need to add a few worms to boost the worm bin up. I have had good luck in the past with Uncle Jim's red worms so I order a small bunch from him. I ordered the batch of 250 Red Wigglers some Organic Fertilizer and Houseplant Sticky Stakes Insect Traps Here is the box they were shipped in.
Here is what I got in my order along with instructions on how to handle the worms.
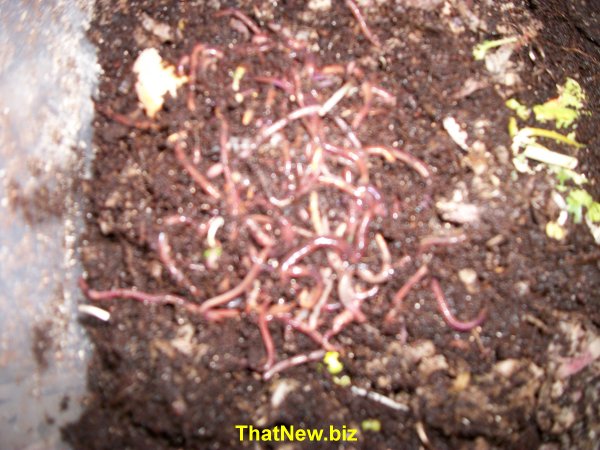
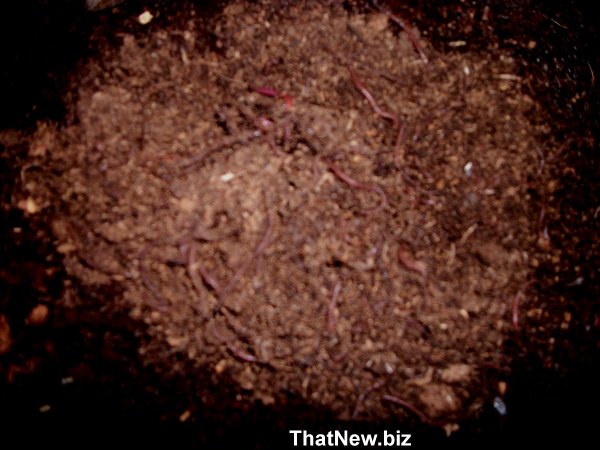
The worms come in a nice Uncle Jim's Worm Farm pull string bag. The instructions said to add a � cup of water to the worms to help rehydrate the worms from shipping. I did that and let them get hydrated for an hour then dumped them in my worm bed.
They were quite lively and with the light on it didn't take them long to bury them self in to the compost bin. I left the light on overnight. The next morning I added some coffee grounds and old lettuce them covered them with paper shreds.
Then I covered it up with news paper.
To figure out how much food waste your household makes a day. You will need about 1000 worms for every � pound of waste you produce. However, that amount of food waste might be too much, depending on air temperature and excess moisture. A foolproof method is to feed them every 2 to 3 days. Be conservative in the quantity. Soon, you will get to know how much food they can handle. They should start eating one feeding before you add another. An entire feeding should be completely gone in 1 to 2 weeks. You can get all the information you need to start your own compost bin at Uncle Jim's Worm Farm. They have a lot more information on how to have success with your own compost bin. If you live near a good fishing place, you could start a business selling fish bait. Uncle Jim's Worm Farm also sells Meal Worms, fish, Birds and Reptiles all enjoy the benefits of the high protein and nutritional value of meal worms.
|
|
How I cook dry navy beans |
|
| How I cook dry navy beans. If you have been buying navy beans to
prep. for SHTF. You need to cook some so you can do it if you need to. You may not be able
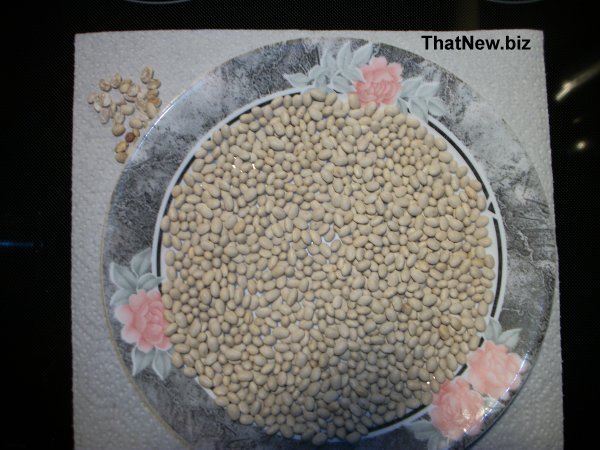
to go online to find out how to cook things if the SHTF. The first few times I cooked them, they didn’t turn out very good. I didn’t cook them enough and they were still somewhat hard. The next time I burned them. Now I have cooked the beans several times using this method and they came out the way I like them. I cook up a batch of navy beans using 4 cups of dried beans. I start a day before I plan on cooking the beans. The first thing I do is take a cup of beans at a time and spread them on a plate. Look them over to make sure there is no small stones or any beans that I don’t like the looks of.
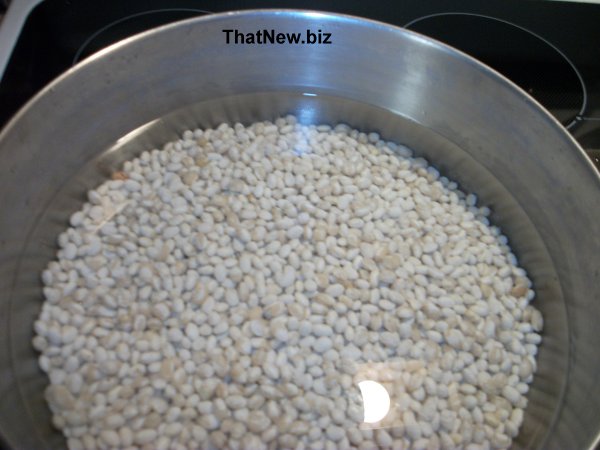
With modern farm equipment, the beans have been very good and a long time science I found any stones in the mix. I rinse the beans of and put them in a 4 quart pan. Added water until there is at least 1 inch above the beans.
I stir in a table spoon of backing soda and let them set over night. The next day when I am ready to cook the beans. I drain the water off the beans and rinse them. Add water until there is at least 1 inch above the beans. Turn the heat on high and bring them to a boil. Just as they are starting to boil there is a foam that starts to form on top of the water.
I scoop the foam off and turn the heat down to a slow boil and cook them for about 45 minutes stirring them often. Once the foam starts to show up it can boial over quite quick.
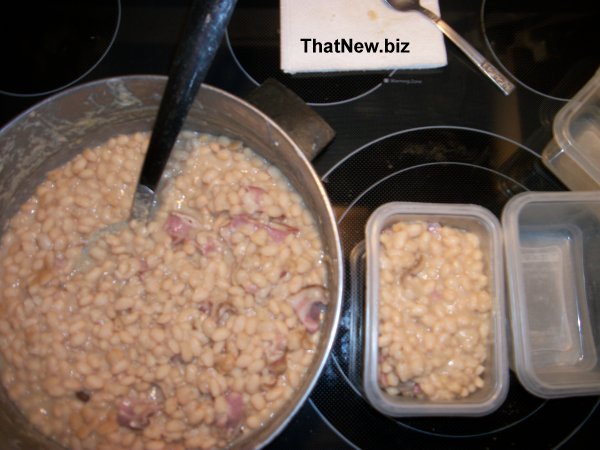
Then I add 4 slices of bacon cut up in � and put them in. Cook for another 30 minutes keeping an eye on the amount of water that is left.
At that point you could use the beans to make bean soup or put them in a pan to bake them in the oven. I add a � cup of brown sugar then turn the heat to low and cook them for about 15 minutes to they thicken up.
You need to keep an eye on them and stir often to make sure they don’t burn. I have had them burn by not stirring and keeping an eye on them at this point. I turn off the heat and let them cool off. I then scoop them in to freezer containers and freeze.
All I have to do is take them out of the freezer and heat them up. You may want to add more or less brown sugar or add your favorite spice to suit your taste. Cook up some dried beans this week. Learn what works for you. I still have to try cooking the beans over a fire. Hope this helps you to giving it a try soon. This free PDF will teach you how to Unlock Your Wealth DNA
|
|
Starting seeds |
|
| The weather has been like spring weather
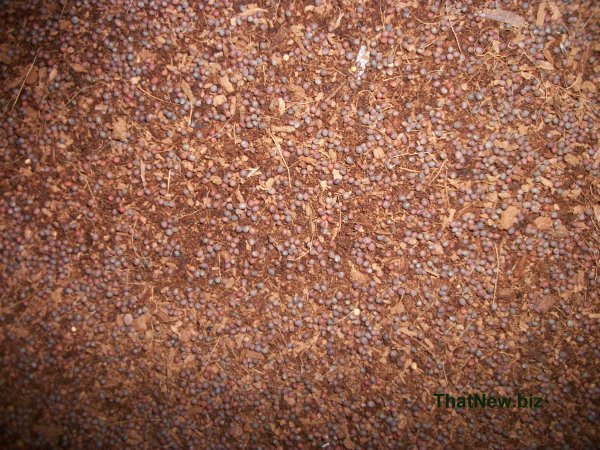
making me want to get started at planting some seeds. I know I might be a bit early ( 2/18/23 ) so I planted some kale seeds and a few marigold seeds in the blocks I made with the soil-blocker. Kale will take a light freeze and keep growing. I am hoping to get an early start on some greens from my garden. I wright down when I start seeds inside and try to remember if the timing was right. It’s about 2 weeks later than I planted pepper seeds last year. Last year’s came out ok. I spreed out the seeds and covered with about 1/4 inch coco coir.
I bought a Seedling Heat Mat, so it might be a bit early for starting peppers. Put a clear cover over the container and put on the heat mat.
|
|
Best tool for start your seedlings indoors |
|
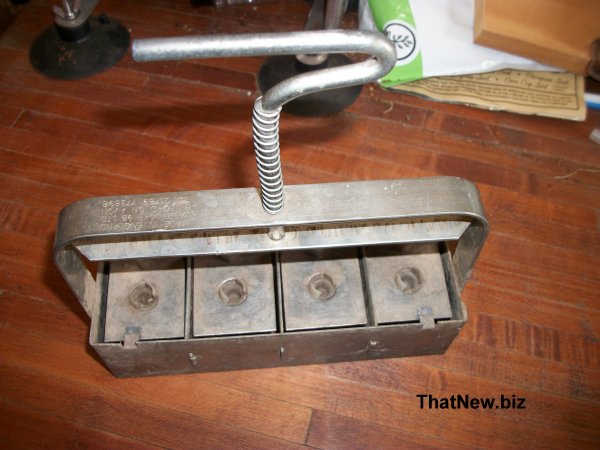
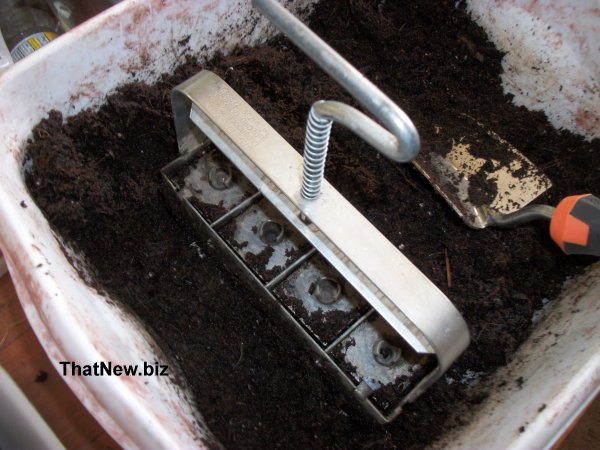
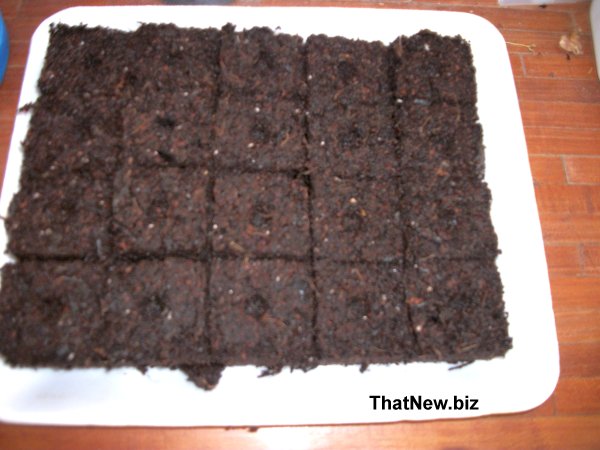
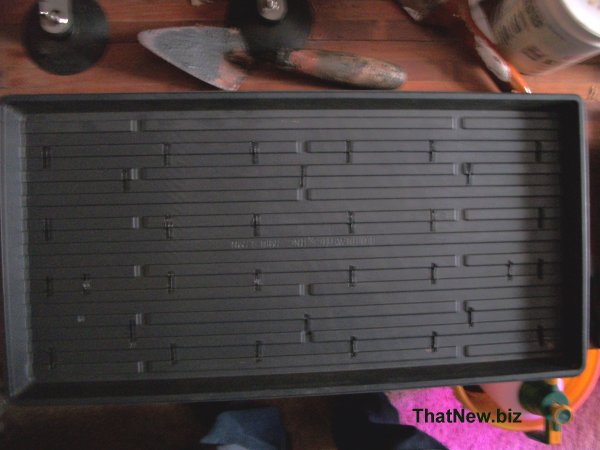
| Never run out of starter pots again! Use a soil blocker tool.
This clever device presses moistened soil into compact blocks that hold their shape — no pot needed. Roots grow freely, get oxygenated, and grow more robustly as a result. Plus, since you just transplant the entire thing into the garden, there's no waste or transplant shock. A Soil-blocker is an ingenious tool for seed-starting. It creates soil blocks for starting seeds and transplanting them. I use equal parts of coco coir, worm casting and potting soil for the soil mixture to make my soil blocks.
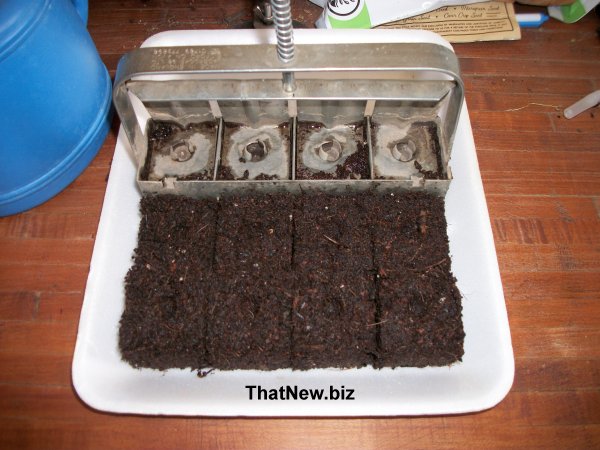
The soil blocker I use is a 2 inch Ladbrooke blocker. I save the trays that are in good shape that come from meat packages I get from the store. They are about the right size for my soil blocks.
These blocks can then be seeded and transplanted into the garden.
This offers many benefits to the grower:
|
|
Grease Candle |
|
| If you cook bacon or fry hamburger what do
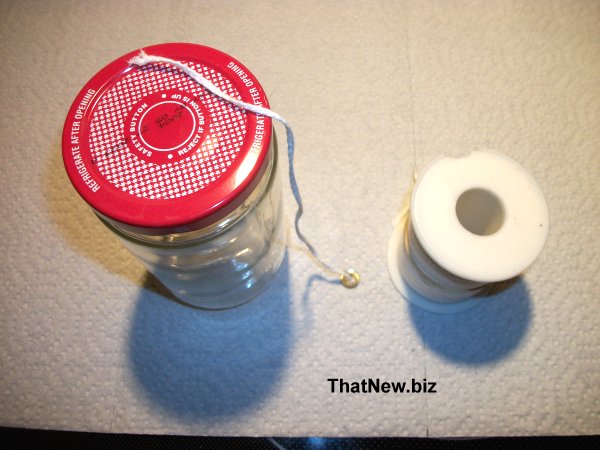
you do with all that grease? It’s not good to pour down the drain. Not only can it clog up the drain, if you have a septic system it is not good for it. Sure, you can use it to cook up other food items. But then you have to keep the different greases separate and use it relatively quickly to keep it safe and edible before use. I always just put my grease in a jar and sent it to the dump. One day when looking at the jar, I remembered seeing something about using lard to make a 1000 hr candle. This got me thinking, I wonder why I couldn’t make my grease into a survival candle. If the power go out it is good to have a backup. If the batteries in your flashlight go dead and you don’t have replacements. That’s when candles are useful to have around. I took an empty 18 oz jar that I had and some wick. I keep bees and made some bees wax candles so I had candle wick material. I got it out and cut some wick about an inch longer than the height of the jar. I glued a thumb tack to the bottom so the wick would sink to the bottom of the jar. If you don’t have wick material you can use 100% cotton string for a wick.
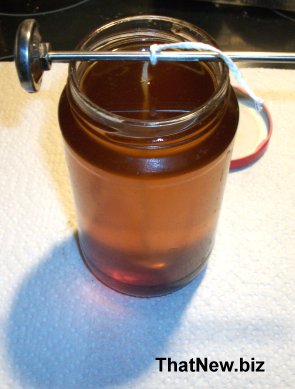
A couple days later I lit my grease candle. After a few hours I found that the wick tipped over in the melted grease. Then it didn't burn as well as it did in my first test. The next time I make a grease candle I am going to try a reinforced candle wick. Like all candles they can be a
fire hazard. Never leave it where children could reach it or unattended. |
|
Get Paid To Use Facebook,
Twitter and YouTube. |
|
Easy Squash Soup |
|
| This is a easy to make butternut squash soup.
I made it using 1/2 the recipe. I used the butternut squash that I froze earlier this fall
and one contaner was 2 cups. I found it to be tasty butternut squash soup. I put the squash,vegetable broth and apple juice in a saucepan. Let
them cook up till they mixed up good. Then I added the rest of the Ingredients and mix
them in. Let it cook for about 5 minutes to let ingredients blend together.
|
|
|
|
|
Coco Coir why I use it. |
|
| Coco coir is a highly absorbent
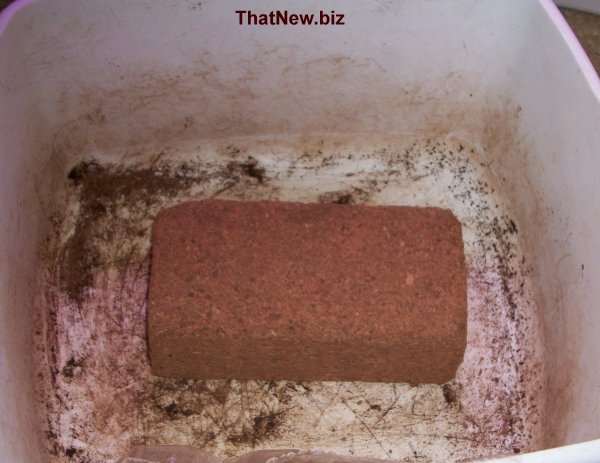
medium, and one of the few growing mediums that is renewable. Coco Coir Origin, Coco coir is a byproduct of the coconut . Between the outer husk and the actual coconut is a layer of fibrous threads. While the outer husk and coconut may be used for textiles and other coconut products, the coco coir is usually set aside. This leftover byproduct is then compacted into bricks or sold loosely for use in agriculture. Compared to its counterpart peat, coco coir is completely renewable, and is viewed as the more sustainable medium. Most coco coir is dehydrated and pressed in to a brick to prevent any contamination or mold.
Them you add water and it expands so you can use it.
First I use coco coir as the medium for microgreens. (see my blog on microgreens) Then I give it to my red wigler compost worms.
When the worms are done with it. I use the casting a fertilizer for my garden. I got my worms from Uncle Jim's worm farm. Uncle Jim's worm farm has everything you need from worms to castings.
Expert Gardener's Expanding Soil is a convenient, compressed 100% Coco Coir soil and CocoPeat soil amendment that expands to roughly 7 times its packaged size simply by adding water. The Expanding Soil holds water and nutrients, making moisture available for the roots to use as they begin to dry out, which also reduces how often you need water. The soil block is easy to handle unlike a traditional bag and does not dirty your hands. This block expands up to 2.25 Cubic Feet and lasts up to 2 years before breaking down and feeding your soil. The Expanding Soil is pH neutral and totally safe to grow in, which makes it the perfect option for vegetables and herbs, especially when combined with soil or fertilizers. In addition it is a premium grade washed coir that is sterile and works as a hydroponic growing medium for all kinds of plants and vegetables. I get my coco coir from Walmart just search for "Expert Gardener expanding soil" at the WalMart web site. |
|
The high price of lettuce |
|
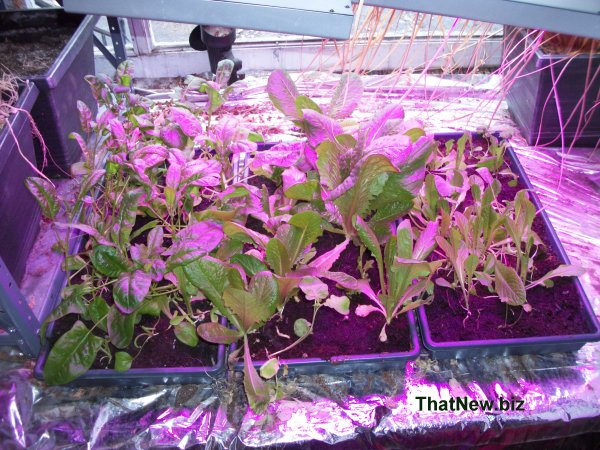
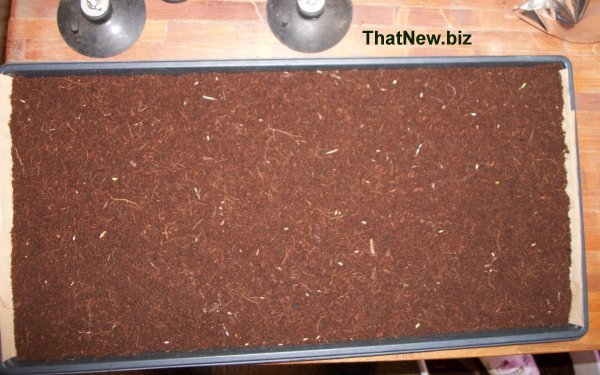
Because of the high price of lettuce and even none to be found at the store, I decided to grow some inside. I put some potting soil in a couple 10 X 20 trays and planted lettuce and spinach in a couple trays. I placed them in my front window to grow.
As you can see this can be done. I have enough for a few salads. This is a way you can have some fresh lettuce and spinach if you have the room and large window.
A better way would be. Grow Plants Abundantly with
AQUA-PONICS |
|
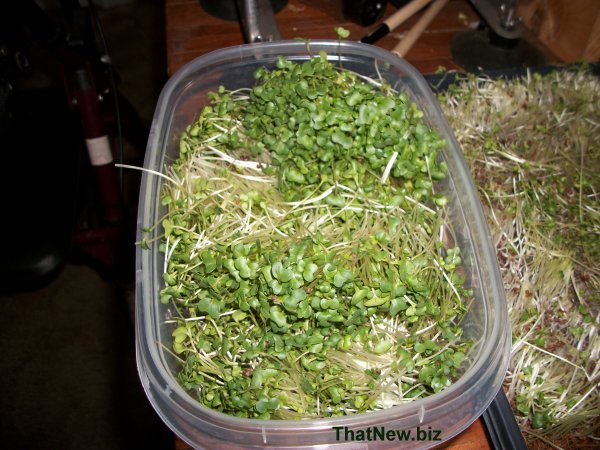
| The best way to grow fresh greens in just over a week is microgreens. Broccoli Microgreens |
|
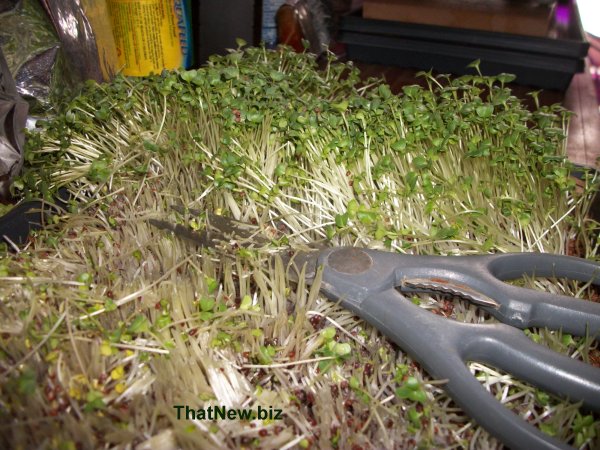
Broccoli Microgreens are easy to grow. I grow my microgreens in a shallow 10" by 20" tray.
I use kitchen scissors to harvest the microgreens. Here is what I got from half of the tray.
Several people grow Microgreens as a business.
|
|
Green Peppers |
|
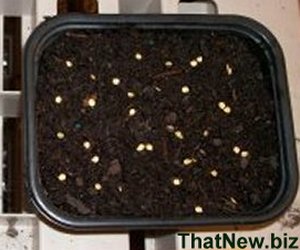
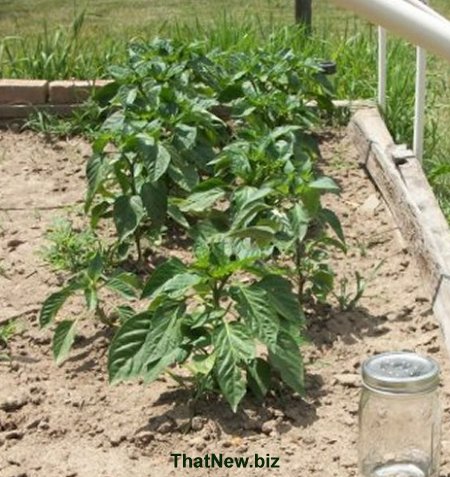
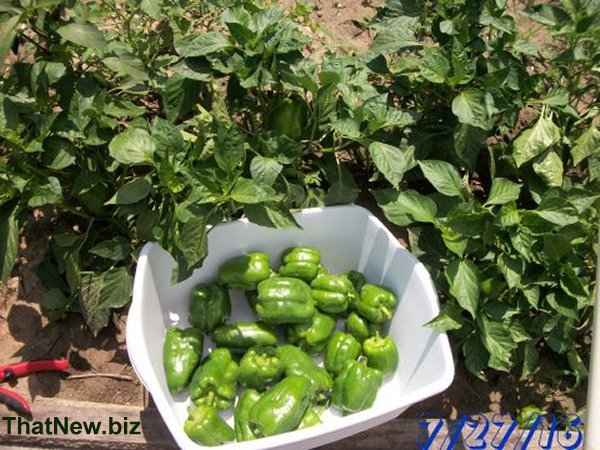
| Green peppers like hot weather to germinate
80f or higher. How I started peppers in my home. Because I live in western New York the tempter in my home is (about 60 f ) and peppers do better in hotter weather. I started planting the seeds on January 16th I planted seeds that I saved from last year’s peppers and some I bought last year. I just spread a lot of seed out and spread a little dirt over the seeds. Then give it some water. You need to put down a lot of seeds because a lot will not germinate.
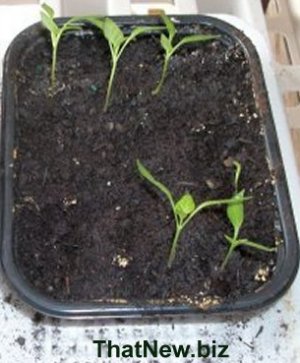
By June 27th the plants were getting much bigger and time to sprinkle some water with Epson salt.
|
|
Growing Zucchini Squash for seeds. |
|
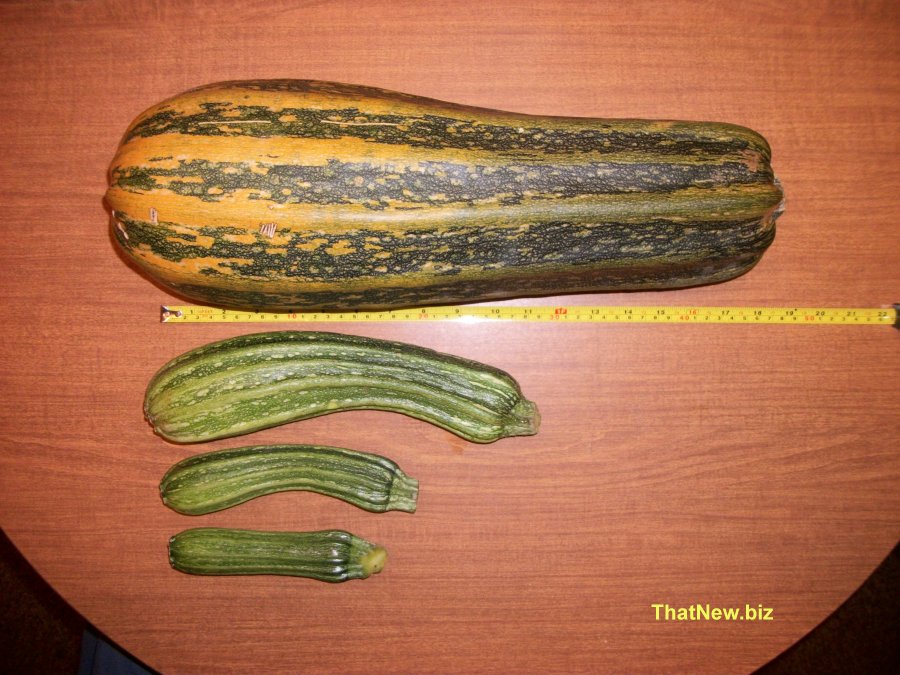
Zucchini is a versatile vegetable and is easy to grow. I save seeds to plant next year. You need to take seeds from Heirloom plants ( non-gmo ) where Heirloom seeds come from open pollinated plants that pass on similar traits to each successive generation. When growing zucchini squash for seeds, it best to grow them far away from other varieties of squash, pumpkins, and gourds so they don't cross pollinate.
Then spread the seeds on Parchment paper and
let them dry. |
|
Butternut Squash |
|
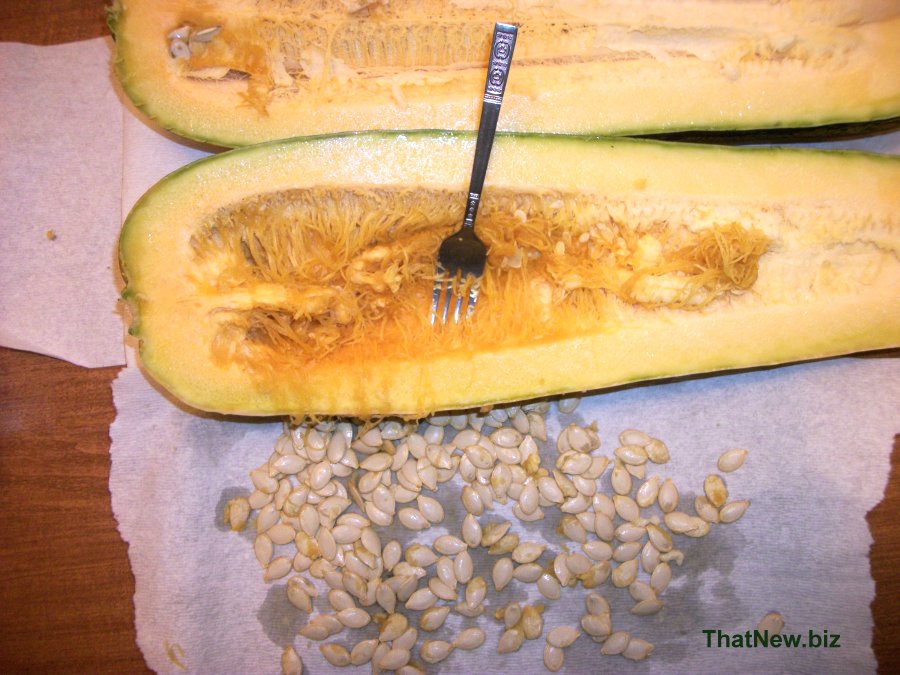
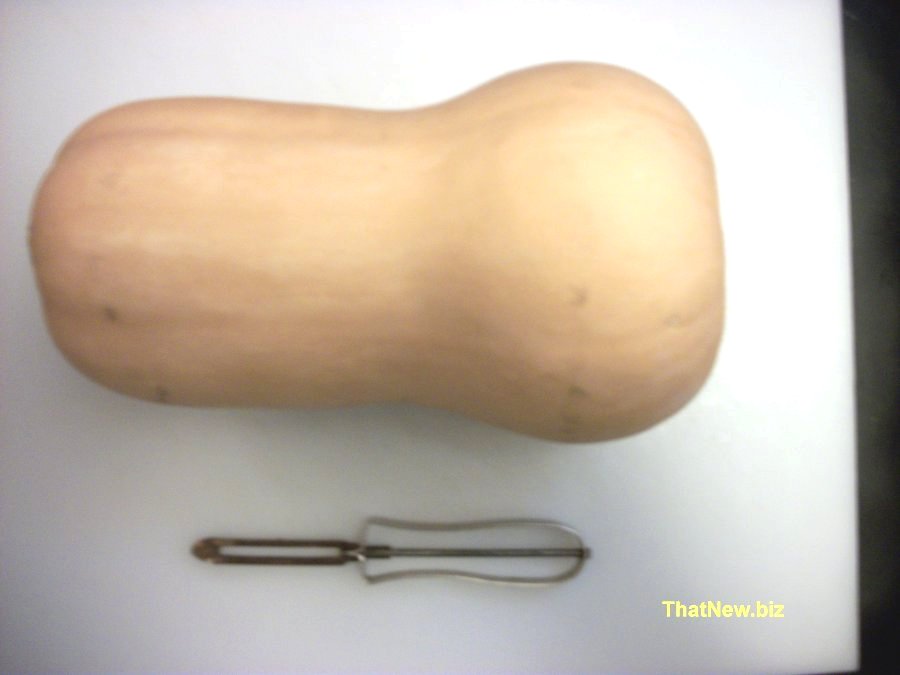
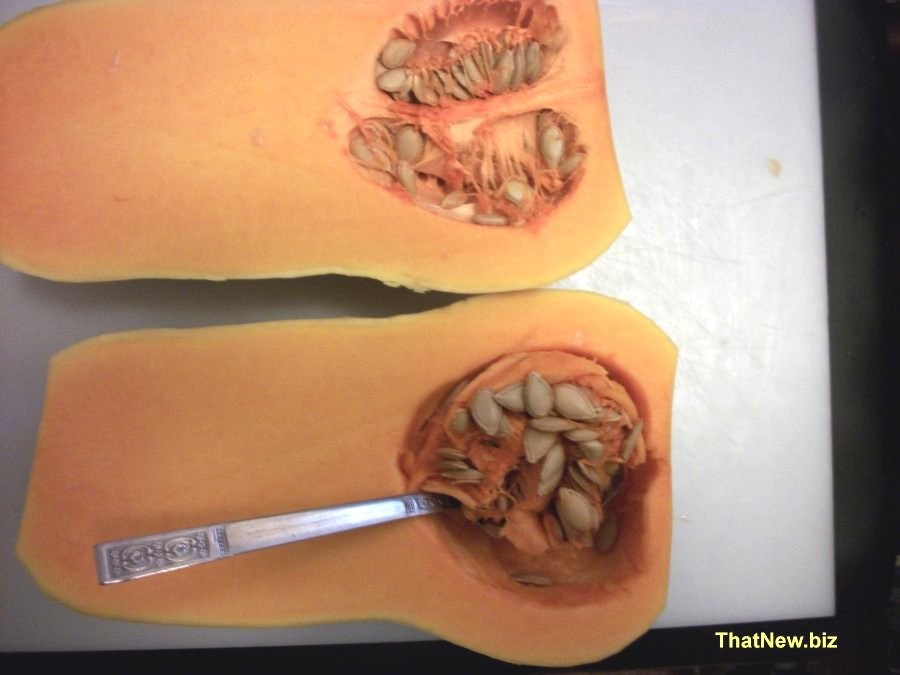
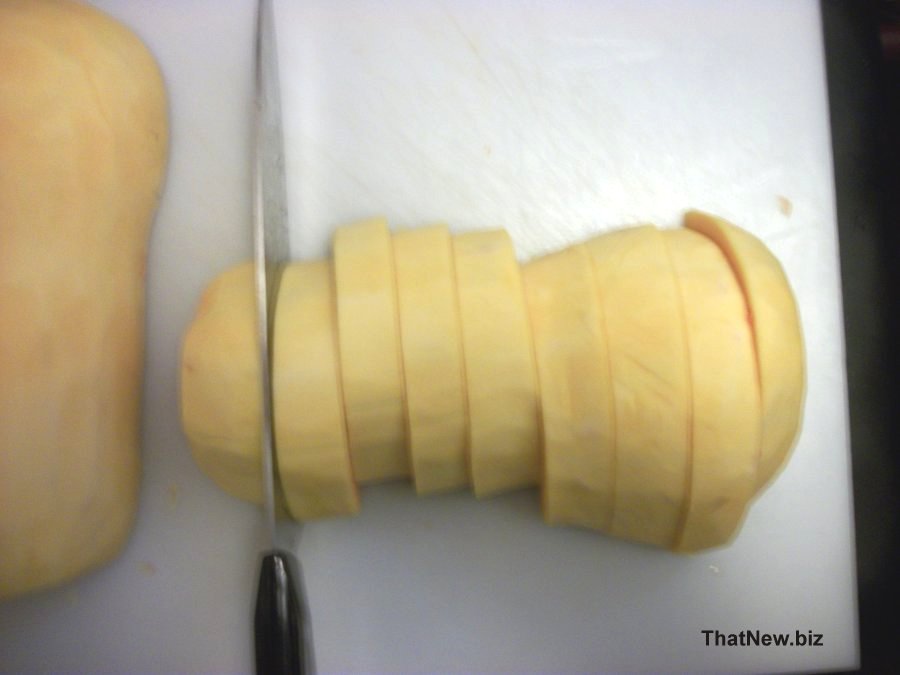
| I grew some butternut squash in my garden.
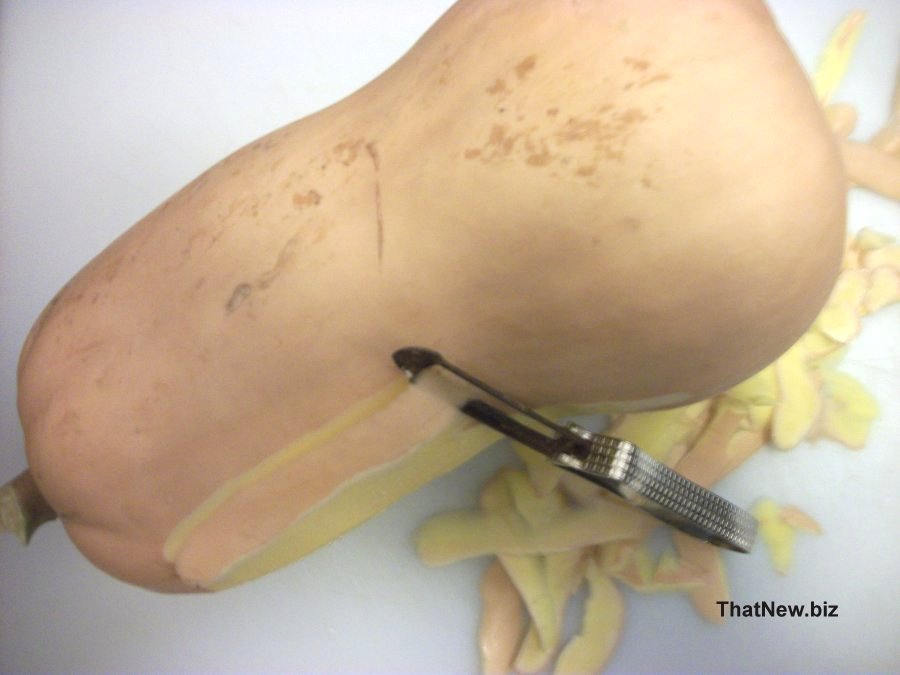
Now I need to cook them up and freeze it. First I wash the squash before I peel the skin
off. I use a Vegetable peeler to peel off the skin.
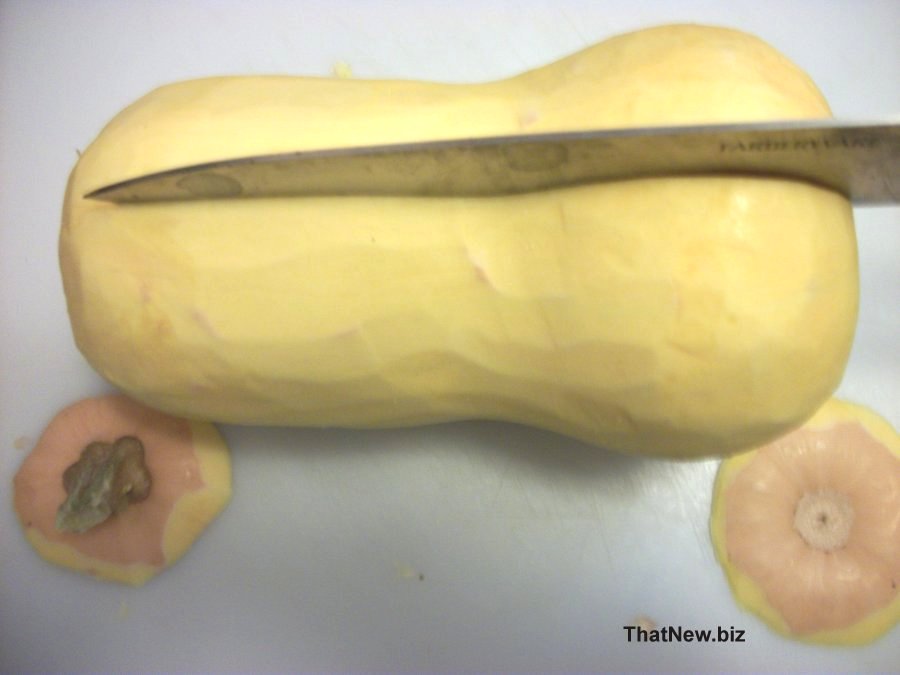
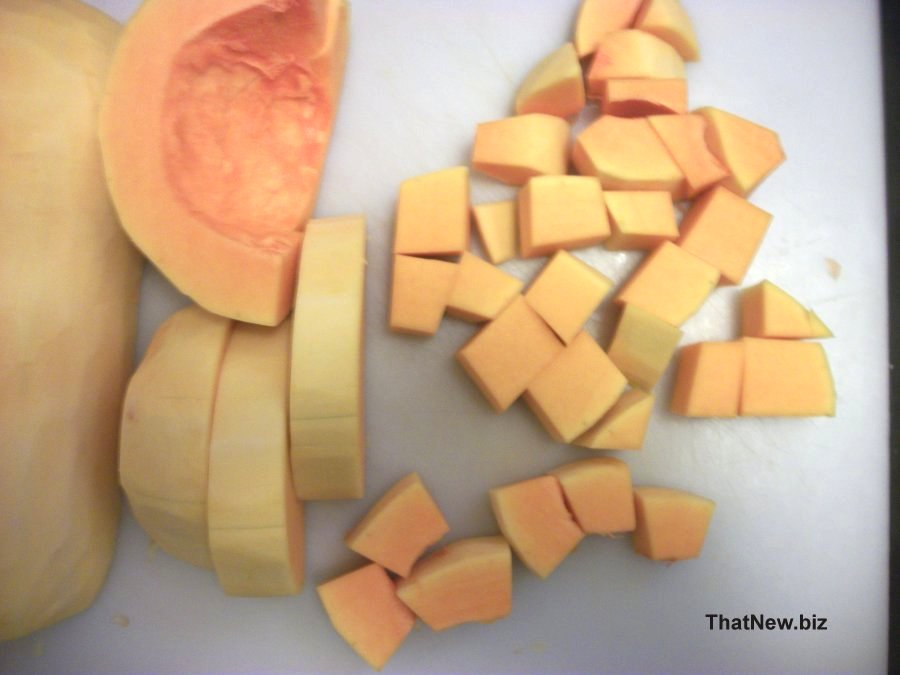
Scoop it up and place in pint freezer containers. What is left in the
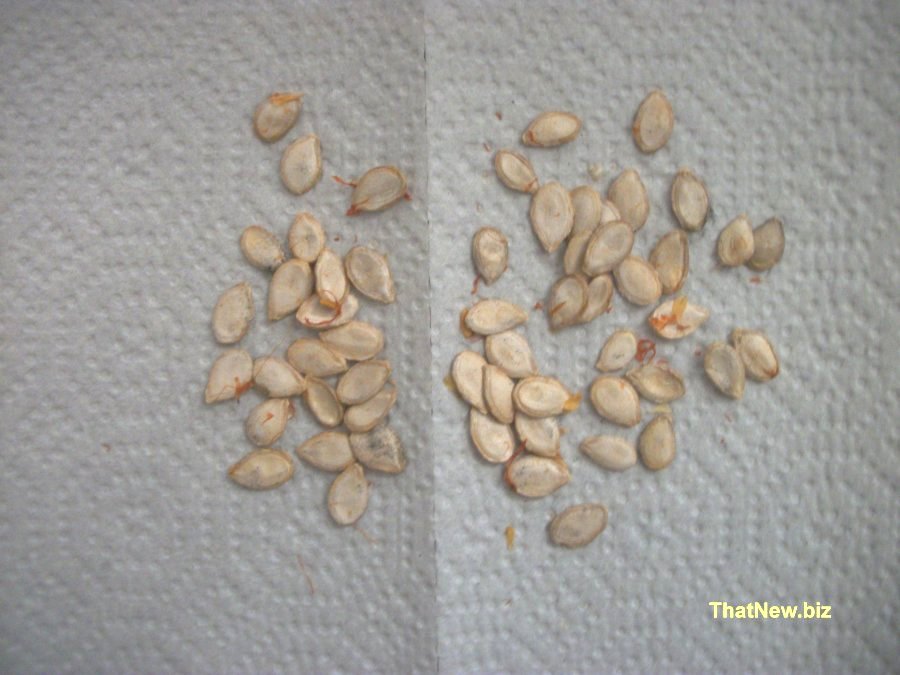
pan, I add some butter and honey for a tasty treat. Don't forget to save a few seeds and
dry them so you will have them to plant next year. You need to take seeds from Heirloom
plants Take some butternut squash out of the freezer and use it to make your favorite squash dish.
Butternut Squash Contains vitamin A ,vitamin C, manganese,
potassium, magnesium , vitamin E, vitamin B6, thiamin, niacin, folate, calcium, iron,
pantothenic acid, copper, phosphorus . We have farmers that plant a field of butternut squash and sell
them at a yard side stand to earn extra money. |
|
Radish sprots |
|
| The time of year when I can't get some
radishes for my salad I grow some sprouts.
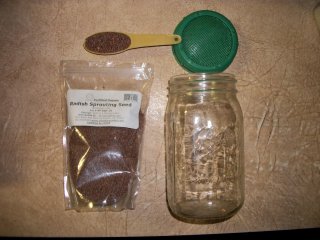
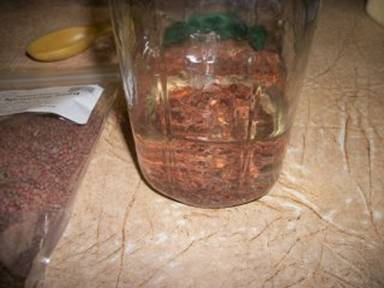
Radish sprouts are easy to grow. All you need is radish sprouting seeds, a jar with a lid that you can drain off the water. I put in about 1 table spoon of seeds and let them soak in water for a couple hours.
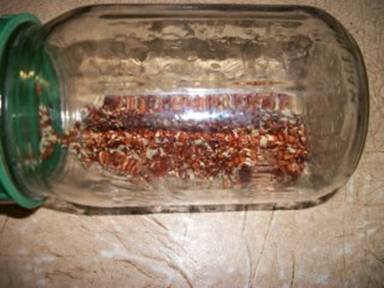
Then drain them and let sit in a dark place. Rinse the seeds off 2 or 3 times a day and drain well. They will start germinating in about a day.
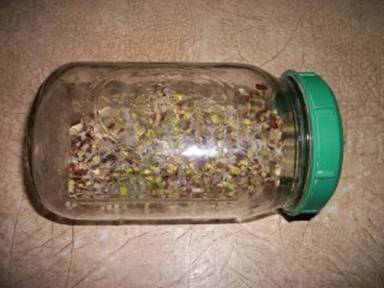
After 3 or 4 days they will grow big enough to eat.
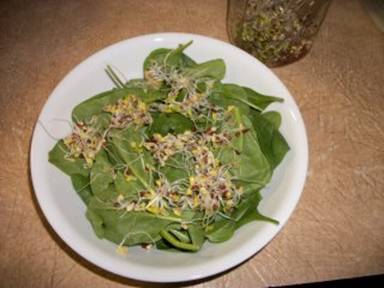
I spread them on the top of my salad to give it a taste of Radishes. Sprouting is fun and easy.
Radish sprouts contain vitamins A, B, C, E, and K, they also have calcium, iron, magnesium, phosphorus, potassium, and zinc. Radish sprouts are also rich in essential amino acids and chlorophyll that can help digestion . Give it a try.
|
|
Blog Introduction |
|
| I am 68 years old and have been doing websites for over 25 years. My first website is WESTNY.com . I had a website business GLASSMARBLES.com for about 22 years. I had to stop that business because of my health. I have to use a walker to get around so I am limited to what I can do. I am doing a blog on this site THATNEW.biz. I am going to use this because I already own THATNEW.biz and going to use it as a blog. I use to do gardening, keep bees, building things and other things. This will give me something to do to keep my mind active. I hope this will give you insight to what older people like to do. 12/12/2022 | |
| bookmark and stop back soon. |
|